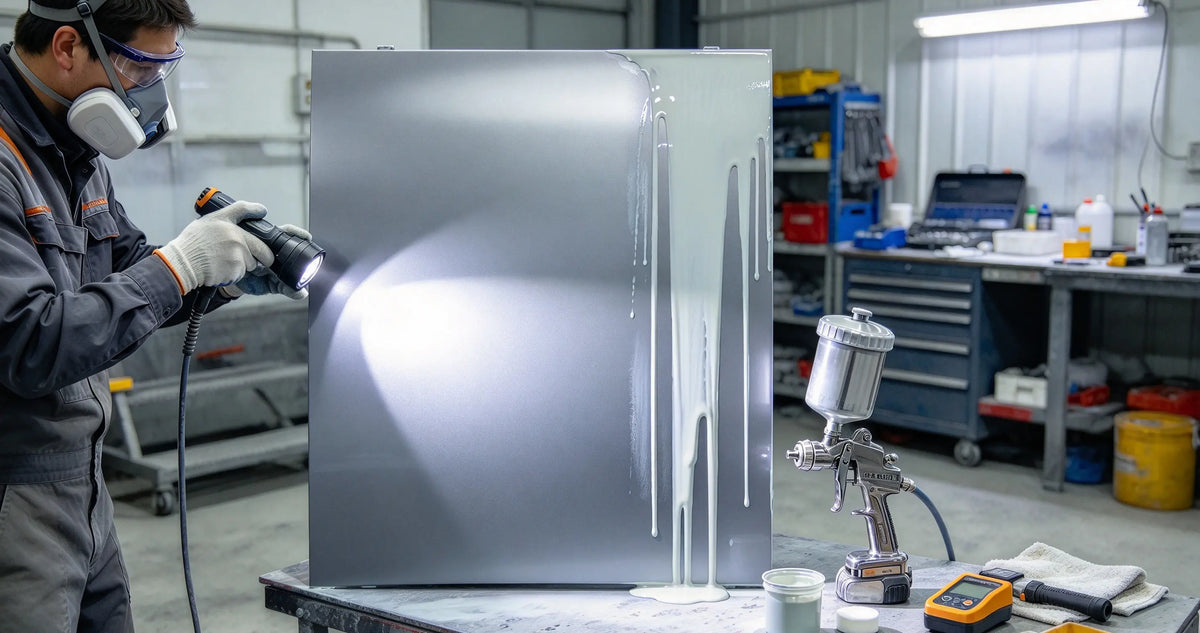
A sealer is meant to provide a uniform foundation for basecoat. When the sealer has not reached its specified recoat condition, the basecoat is applied too heavily, the temperature is unsuitable, or the products are incompatible, the finish can run, wrinkle, lift, or stay soft during drying.
Start by identifying what the surface is actually doing. A gravity run usually forms a downward trail or raised sag. Wrinkling, swelling, or separation can point to a reaction or failed adhesion. Small craters and pinholes suggest a different problem, such as solvent popping. The repair depends on the diagnosis.
|
What you see |
Likely direction |
Do not do first |
|
Downward sag or raised ridge |
Excessive wet film or localized slow movement |
Do not sand while the film is soft. |
|
Wrinkled or swollen area |
Lifting, solvent sensitivity, or incompatible layers |
Do not bury it under more basecoat or clearcoat. |
|
Persistent softness or slow drying |
Trapped solvent, heavy film build, or low temperature |
Do not force-dry outside the product procedure. |
|
Small craters or pinholes |
Solvent popping or contamination |
Do not assume it is a simple run. |
1. Sealer Has Not Reached Its Recoat Condition
Many sealers are designed for wet-on-wet application, but that does not mean basecoat can be applied immediately. The sealer must receive the flash time and be topcoated inside the manufacturer’s window. Surface dryness alone is not proof that the full film is ready.
· Follow the sealer TDS rather than a generic waiting time.
· Account for the number of coats and the applied film thickness.
· Maintain the recommended panel, material, and booth temperature.
· Use the visual indicators supplied by the manufacturer when they are part of the procedure.
2. The First Basecoat Pass Is Too Heavy
A wet first coat can create an unstable film, especially over a sealer that has not flashed adequately. Flooding the panel to achieve full hiding immediately increases the chance of runs, slow drying, solvent retention, and uneven color.
Apply controlled coats, keep the gun moving at a steady speed, avoid lingering at edges and recesses, and build coverage progressively. Solid, metallic, and pearl colors may use different application methods, so follow the basecoat instructions for the specific product.
3. Solvent Is Trapped Under the Basecoat
Solvent can remain in the coating stack when the sealer is too heavy, the flash period is shortened, the basecoat is applied at excessive film thickness, or airflow and temperature are unsuitable. As the layers cure, the trapped material can contribute to wrinkling, soft areas, popping, pinholes, or loss of adhesion.
Do not immediately raise bake temperature to force the problem away. Premature heating can skin the surface while solvents remain underneath. Follow the paint system’s prescribed flash and cure procedure.
4. Sealer Flash Time and Temperature Are Wrong
Flash time changes with panel temperature, material temperature, film thickness, airflow, reducer or activator choice, and the number of coats. A time that works in a warm booth may be inadequate on a cool panel.
|
TDS item |
Why it matters |
|
Minimum flash time |
The shortest permitted interval before basecoat under specified conditions. |
|
Maximum recoat window |
The latest time for direct topcoating without extra preparation. |
|
Dry or sanding requirement |
Whether the sealer must be fully dry, sanded, or otherwise prepared. |
|
Temperature range |
The conditions under which the stated timing is valid. |
|
Film-build limit |
The number of coats and thickness used to establish the timing. |
A product-specific example such as a 15–20 minute interval at 23°C must stay clearly labeled as an example. It is not a universal rule for every sealer.
5. Basecoat Is Lifting the Sealer
If the basecoat wrinkles, swells, or pulls away, the issue may be more serious than a surface run. Possible causes include an under-flashed sealer, a solvent-sensitive layer, an expired recoat window, contamination, or products that were never approved for use together.
|
Before rebuilding |
Confirm |
|
Compatibility |
Sealer, basecoat, reducer, activator, and older layers are approved together. |
|
Mixing |
The sealer and basecoat ratios were measured correctly. |
|
Timing |
Minimum flash and maximum recoat windows were followed. |
|
Substrate |
The old coating and preparation beneath the sealer are stable. |
|
Repair scope |
All visibly lifted or unstable material will be removed, not covered. |
How Long Should Sealer Dry Before Spraying Basecoat?
There is no single answer. Some sealers are wet-on-wet; others must dry and be sanded before topcoating. Check the exact product TDS for the minimum flash time, maximum recoat window, and whether sanding or another preparation step is required.
How to Fix Base Coat Running Over Sealer
1. Identify the defect under suitable lighting. Decide whether it is a gravity run, wrinkling, lifting, blistering, or a different surface problem.
2. Let the coating reach the condition specified for repair. Sanding soft material can clog abrasives and spread the defect.
3. Sand back the affected area after it has hardened enough. For lifting or loss of adhesion, remove all unstable material rather than leveling only the top ridge.
4. Rebuild the system over a sound substrate. Reapply primer or sealer if the TDS requires it, and use the correct flash time before controlled basecoat coats.
5. Inspect before clearcoat. Stop if runs, lifting, uneven coverage, contamination, or instability remain visible.
For the surface-preparation sequence, use the paint prep before base coat guide together with the coating TDS.
What Happens If You Spray Basecoat Too Heavy Over Sealer?
Excessive film build extends drying time and increases the amount of solvent that must escape. When the sealer is also too wet, the combined stack is more vulnerable to runs, slow drying, solvent retention, wrinkling, and lifting.
The answer is not to use as little material as possible. The objective is the correct film thickness and number of coats for the system, with the required flash time between applications.
Preventing Basecoat Problems with Better Spray Technique
Once the sealer is ready, keep the gun at the recommended distance, move at a steady speed, and maintain even overlap. Avoid stopping with the trigger engaged over one section or slowing down at panel edges.
The PHS-155 car paint sprayer is one option to evaluate when its 1.3 mm basecoat/clearcoat configuration or 1.8 mm higher-viscosity setup matches the product requirements. Confirm the gun settings against both the paint TDS and the gun instructions.
For pressure and fluid control, see the spray gun air pressure regulation guide. The gun cannot correct an incompatible or insufficiently flashed sealer.
Frequently Asked Questions
Why did my base coat run over the sealer?
Common causes include excessive wet application, insufficient flash time, incorrect temperature, heavy film build, or incompatible products. Diagnose a gravity run separately from lifting or wrinkling.
How long should sealer dry before base coat?
Use the exact minimum flash time, maximum recoat window, and dry or sanding requirements in the sealer TDS. The interval varies by product and conditions.
What happens if you spray basecoat too heavy over sealer?
Heavy film can cause runs, slow drying, solvent retention, uneven color, and increased risk of lifting or wrinkling when the sealer is also too wet.
Can basecoat reactivate sealer if it is not fully flashed?
Depending on the chemistry, basecoat solvents can soften or disturb an under-flashed sealer. Follow the approved flash and compatibility requirements.
Why does my paint look like it is separating from the sealer?
The appearance may indicate lifting, poor intercoat adhesion, contamination, or a reaction with an older layer. Remove unstable material and rebuild over a sound substrate.
Final Takeaway
When basecoat runs over sealer, the fix begins with diagnosis and timing. Insufficient flash, excessive film build, incorrect temperature, and incompatible materials can look similar but require different corrective actions.
Use the exact TDS, respect the recoat window, apply controlled coats, and inspect before clearcoat. Equipment can help manage material delivery, but reliable results depend on the complete coating system.
Udostępnij:
What Is a Glued Patch Panel Ghost Line?
Can I Spray Clearcoat the Next Day Over Basecoat?