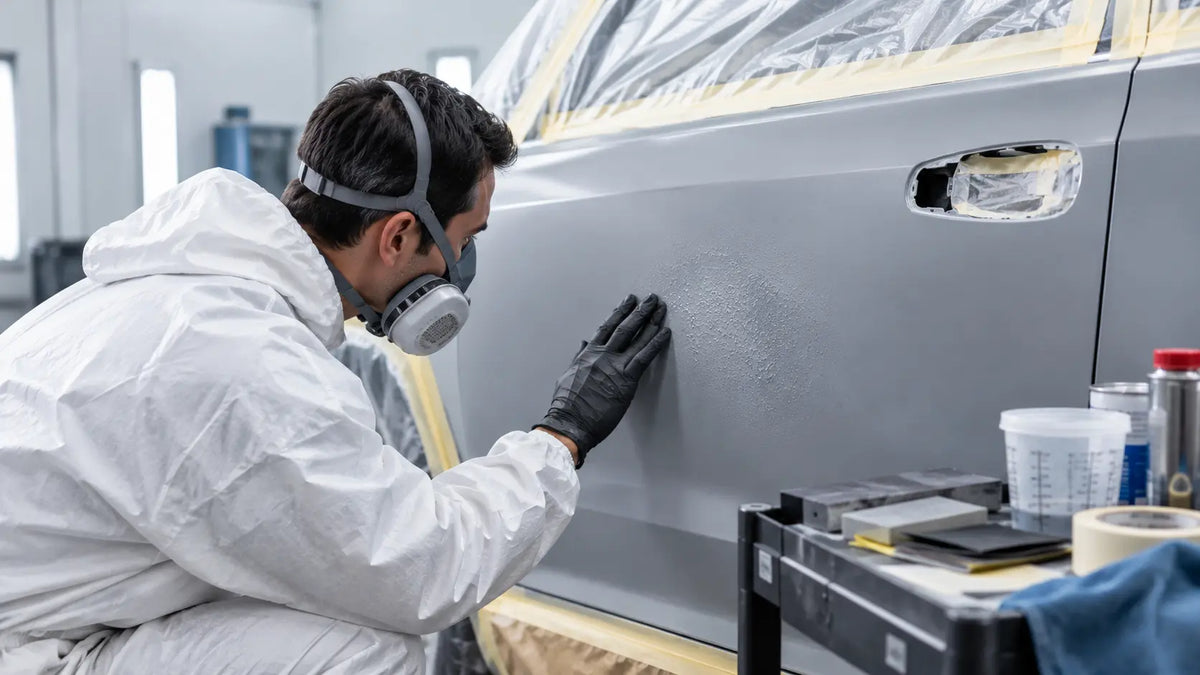
A sandy primer coat creates extra work before color even enters the gun. Most high build primer spraying problems become easier to trace when you separate the mixture, the spray pattern and the surface condition. Check those before adding reducer or increasing pressure.
High-build primer is made to fill small imperfections and then be sanded. Some texture can be normal. Deep, dry roughness, heavy ridges, lifting or a soft film need a closer look before basecoat.
Why Is My High Build Primer So Rough and Sandy
Dry spray and poor atomization can look similar on a panel. Dry spray feels dusty because droplets lose too much carrier before landing. Poor atomization can leave larger droplets and an uneven deposit. Both deserve a test pattern, but they do not always need the same adjustment.
|
Symptom |
Check first |
Next step |
|
Fine, dusty roughness |
Gun distance, reducer selection and conditions |
Return to the specified distance and approved mixture |
|
Coarse droplets or spitting |
Nozzle, air cap, viscosity and air supply |
Inspect the gun and spray a fresh test pattern |
|
Runs and heavy ridges |
Fluid delivery, travel speed and coat thickness |
Reduce local buildup within the product procedure |
|
Bands between passes |
Overlap, angle and pressure during a full pass |
Make the pass pattern and air delivery consistent |
|
Softness, lifting or cracks |
Mixing, drying and the underlying coating |
Assess the failed layer before sanding or recoating |
Check the mixture before changing the gun
Confirm the primer, hardener and any permitted reducer by product code. Measure the ratio, mix thoroughly and respect pot life. If the product specifies an induction period, allow it. Material that has begun to thicken in the cup is a poor basis for setting the gun.
Extra reducer may make a thick material pass through a small nozzle, but it can change build and drying behavior. Use only the reduction listed for the application you are doing. Surface preparation matters just as much; our paint prep before basecoat guide covers the cleaning and feathering sequence.
Inspect the fan and air supply
Dried primer around the air cap or fluid nozzle can disturb the pattern. Clean and inspect the parts using the gun manual, then test again. Do not enlarge precision openings with a metal pick.
A compressor can show plenty of pressure at rest and still struggle through a long pass. Check the pressure while air is flowing, including the hose, regulator, couplings and filters. A good first burst followed by a weak fan suggests that sustained air delivery needs attention.
Keep distance and movement repeatable
Moving farther away to reduce a wet coat can turn it into dry spray. Use the distance specified for the gun and material, keep the fan perpendicular to the panel and maintain a steady travel speed. Once the pattern is balanced, change one variable at a time on a test panel.
What Size Spray Tip Works for High Build Primer
Choose the nozzle from the exact primer technical data sheet, usually called the TDS. The words “high build” do not identify one viscosity or one required tip.
For example, the PPG OMNI MP282 TDS lists a 1.3–1.6 mm gun setup. That is a useful counterexample to the claim that every high-build primer requires a 1.8–2.0 mm tip. It is not a nozzle recommendation for another brand or another gun.
If your selected primer calls for a larger setup, use one. Do not force it through a finishing nozzle by exceeding the allowed reduction. A large nozzle also needs controlled fluid delivery; more output can create sags when travel speed and flash time do not match.
What PSI Should I Spray 2K Primer At
There is no single 2K primer pressure. Read where the value is measured as well as the number itself. HVLP air-cap pressure and gun inlet pressure are different measurements.
|
Pressure reference |
Where it is measured |
How to use it |
|
Gun inlet pressure |
At the gun connection while air flows |
Follow the gun maker's setup procedure |
|
HVLP air-cap pressure |
At the cap with the required test equipment |
Do not copy this number onto the inlet gauge |
|
Compressor pressure |
Upstream of the hose and fittings |
Check what remains available at the gun |
MP282 lists 8–10 psi at the HVLP cap and 29–40 psi at a compliant gun, with a reminder to follow the spray gun manufacturer's inlet guidance. Those values belong to that material and equipment category. They are not settings to transfer to a PRD-725 automatically.
For the working-pressure check, see spray gun air pressure regulation. Stay within the gun's operating range and confirm that the coating can be applied with that setup.
How to Fix Rough 2K Primer Texture
First decide whether the primer is sound. A bonded, properly dried layer with surface texture may be leveled. A lifting, cracked or persistently soft layer needs a repair plan for the failure beneath it.
- Let the primer reach its specified sanding condition. A soft film can smear and clog abrasives.
- Apply a compatible guide coat and block-sand using the primer and next-coat sanding instructions. Remaining guide coat helps reveal low areas and scratches.
- Stop if unwanted substrate breaks through. Prepare exposed metal, filler or plastic with the approved system before continuing.
- Correct the original spray problem before another application. Check mixture, fan, air delivery and distance against the test panel.
- Reprime only where the repair requires it, keeping within the allowed film build and flash schedule.
Do not keep sanding a high spot until the surrounding panel is cut through. If the contour is wrong, correct the repair rather than building and sanding more primer indefinitely.
How to Fix Runs and Layering in Primer
Let a run harden enough for the product's repair procedure, then level it carefully. Thick areas may need longer than the surrounding coat to reach a usable sanding condition. Check the whole surface with a guide coat after leveling.
Ridges between passes usually deserve an overlap and movement check. Slowing down at panel edges, tilting the gun or returning repeatedly to one area changes film thickness. Maintain an even rhythm and the coat sequence specified by the primer maker.
Where the PRD-725 Fits
The PRD-725 is published with 1.3 and 1.4 mm nozzles and a 1.5–2.0 bar working range. Match those limits to the selected coating before use. A primer that specifically needs a larger nozzle requires a different setup; the PRD-725 can remain the finishing gun for compatible basecoat or clearcoat.
Before spraying a 2K product, read its safety data sheet. For isocyanate-containing spray coatings, use a suitable controlled spray area and the required respiratory protection. HSE specifies air-fed breathing apparatus for this work. An ordinary dust mask is inadequate. Review the 2K coating safety guide before the application stage.
Frequently Asked Questions
Can rough primer be sanded smooth
Yes, if it is sound and has reached the specified sanding condition. Use a guide coat to check the contour. Lifting, cracks or persistent softness require more than leveling the surface.
Does a bigger nozzle always fix rough primer
No. The wrong mixture, a blocked air cap, weak air delivery or excessive gun distance can still produce roughness. Fit the nozzle approved for the material, then test the complete setup.
Should I increase PSI until the primer looks smooth
Stay within the material and gun guidance. More pressure can increase overspray and dry deposition in some setups. Diagnose the fan and mixture before changing pressure.
Do I need sealer after sanding primer
Only when the selected paint system calls for it. Prepare any exposed substrate and use the final sanding profile required by the sealer or basecoat that will follow.
Before Moving to Basecoat
The panel is ready when the primer is stable, the contour is level and the remaining scratches suit the next coating. Check the surface under useful inspection light, prepare any sand-throughs and record the setup that produced the better test pattern.
Compartilhar:
What Is the Blending Technique in Automotive Refinishing?
2K Paint Over 1K Primer Reaction and How to Fix It