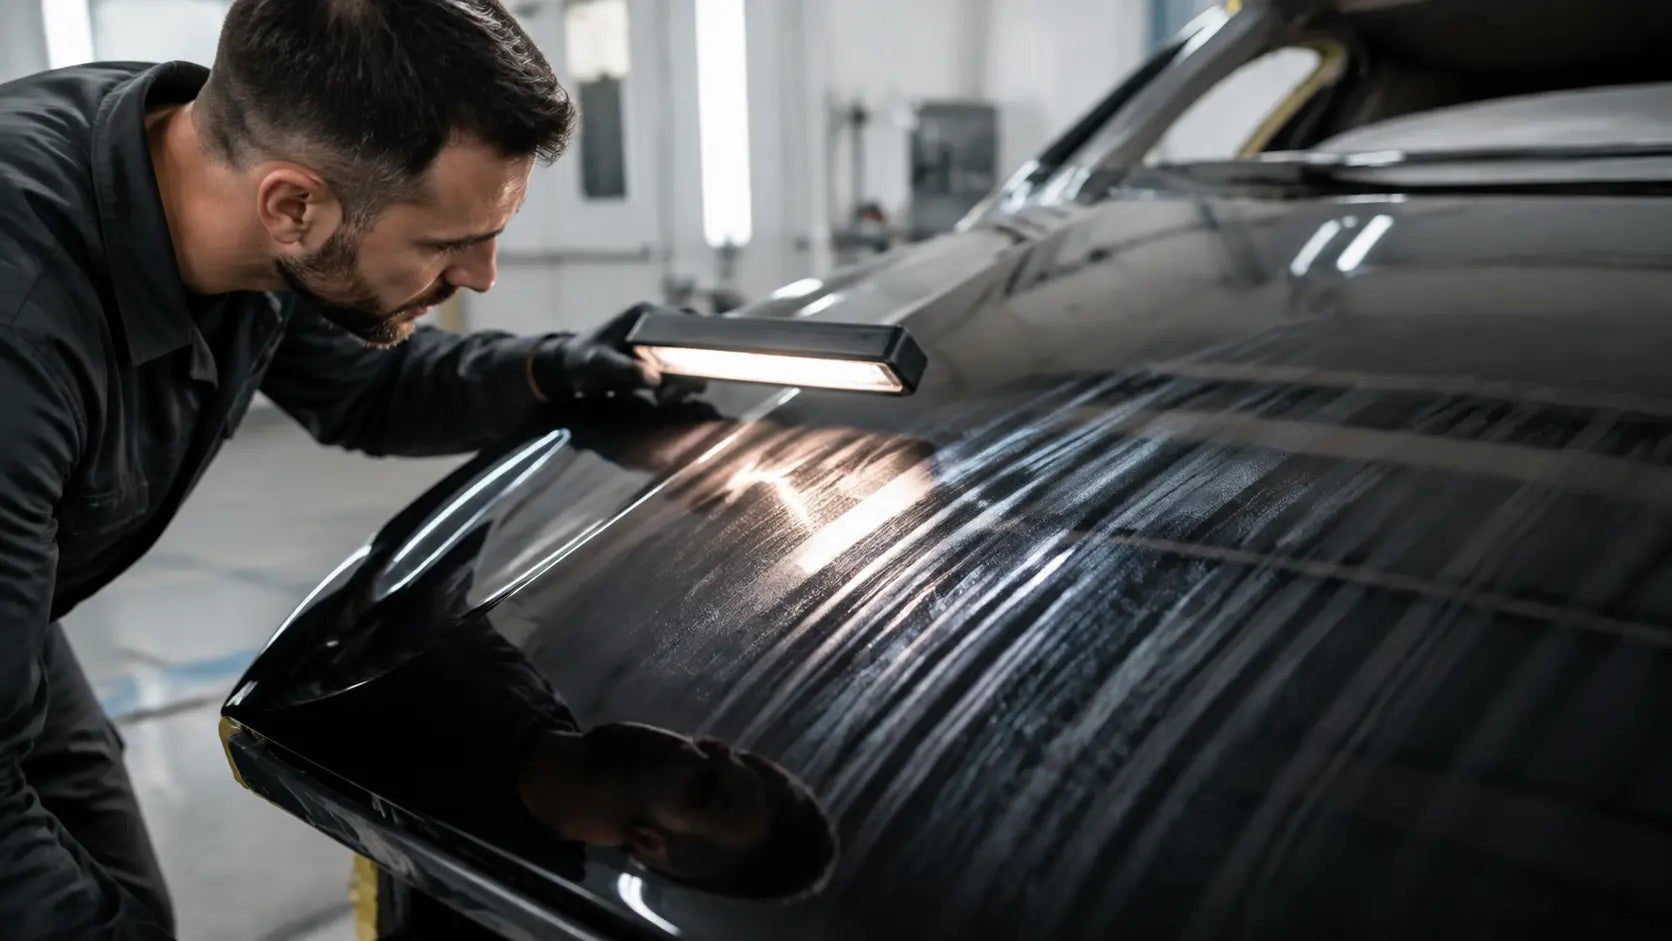
You finish the last pass, step back under the booth lights, and the panel does not look uniformly wet. Instead, you see bands: one section looks flatter or glossier, the next looks drier, and the pattern seems to follow the way the gun moved across the panel. Painters often call this “tiger striping.”
That description is understandable, but it is worth being precise. Tiger striping is more commonly used for light-and-dark bands in metallic or pearl basecoat. In clear coat, the defect is often better described as striping, overlap lines, dry bands, or uneven gloss caused by differences in film build and texture.
The name matters less than the diagnosis. Before you sand anything, work out whether the problem is only surface texture or whether the clear was applied unevenly enough that the film itself needs to be rebuilt.
Quick Diagnosis: What Kind of Stripe Are You Looking At?
|
What you see |
Likely issue |
First question |
|
A visible line exactly where one pass met the next |
Overlap line / wet-edge problem |
Did the passes merge while the clear was still wet enough to level? |
|
Alternating dull and glossy bands |
Uneven texture, dry spray, or uneven film build |
Are the dull areas rougher, drier, or visibly thinner? |
|
Bands plus metallic light/dark variation under the clear |
Basecoat mottling or tiger striping |
Is the color itself uneven under an otherwise uniform clear? |
|
One area looks heavy and another dry |
Speed, distance, angle, pressure, or overlap changed across the panel |
Did the gun remain square and the dynamic pressure remain stable? |
Clear-Coat Striping vs. Overlap Lines
If the defect appears as a distinct edge between passes, start with our deeper guide to clear coat overlap lines. Overlap lines are usually tied to the way adjacent passes met and flowed together.
Striping is a broader description. It may be caused by overlap, but it can also come from dry spray, a changing spray distance, pressure drop, arcing the gun, or inconsistent travel speed. On a large hood or roof, small changes in technique repeat over a long distance, so the pattern becomes obvious in reflection.
The Five Things I Would Check Before Blaming the Clear
1. Did the gun stay square to the panel?
A common mistake is keeping your elbow in one place and swinging the wrist. The center of the pass stays close to the panel while the ends move farther away. That changes atomization and wetness across every stroke.
Keep the gun as perpendicular as practical and move your arm with the panel instead of painting in an arc.
2. Did your overlap stay consistent?
There is no single overlap percentage that works for every gun and every clear. The correct amount depends on fan shape, material, gun distance, speed and the coating system. Many clear-coat setups use more overlap than a simple 50/50 pattern because the goal is to keep a continuous wet film, but the final reference should be your spray-gun guidance and the clear-coat TDS.
If large panels are where the pattern falls apart, review the technique for keeping a wet edge on large panels before changing three gun settings at once.
3. Was part of the panel receiving dry spray?
Dry spray can look like a stripe because the affected band reflects light differently from the wetter areas beside it. Typical contributors include excessive distance, too much travel speed, unsuitable reducer/hardener speed for the temperature, or a pattern edge that is not carrying enough material.
If the surface feels pebbly rather than simply uneven in gloss, compare it with our orange peel troubleshooting and dry-spray guidance before deciding on the repair.
4. Did air pressure or material delivery change during the pass?
Static regulator pressure is not enough. What matters is the pressure and airflow while the trigger is pulled. A compressor that cannot keep up can change atomization halfway across a large panel. A partially blocked cap or fluid passage can create the same kind of inconsistency.
5. Were you chasing gloss with too much material?
Trying to erase a dry band by immediately flooding the next coat creates a new risk: runs, solvent trapping and excessive film build. The fix for striping is controlled consistency, not simply ‘more wet.’
If you are balancing gloss against sag risk, see how to prevent clear coat runs before making the next coat heavier.
Do Not Use Generic Coat Counts or Flash Times
One of the easiest ways to make a clear-coat article sound confident and still be wrong is to prescribe the same two or three coats and the same flash time for every product.
Do not do that. Some clears use a two-coat schedule, some use a 1.5-coat process, and some have product-specific flash or bake requirements. Use the exact clear, hardener and reducer TDS for mix ratio, coat count, flash, pot life and cure schedule. A generic ‘tacky finger test’ is not a substitute unless the manufacturer specifically calls for it.
Can You Polish the Stripes Out?
|
Condition |
Likely repair |
|
Gloss difference caused mainly by surface texture and enough clear remains |
After full cure, controlled sanding/polishing may level the texture. |
|
Dry, rough band with adequate film build |
Correction may be possible, but confirm how much film can safely be removed. |
|
Clearly thin or uneven film build |
Polishing can improve appearance but cannot put missing clear back; refinishing may be required. |
|
Metallic/basecoat tiger striping visible beneath the clear |
The color layer is the problem; clear-coat polishing will not correct it. |
|
Runs or heavy ridges beside dry bands |
Use a defect-specific correction process; do not keep adding clear to chase uniformity. |
Where the PRD-817 Fits
Once the material, air supply and technique are under control, a stable spray gun helps make the process repeatable. The current PRD-817 uses a 1.3 mm setup, a published operating range of 1.3–1.8 bar, 15.2 CFM air consumption, 175 ml/min fluid delivery, a 150 mm recommended spray distance and a 260–350 mm spray pattern.
Those numbers also explain why setup matters. Read our PRD-817 setup, air demand and limitations before assuming the gun will behave the same on a small compressor or with every clear coat.
A gun can help you apply a consistent film. It cannot fix the wrong reducer, a pressure drop, a rushed flash schedule or a basecoat that was already striped before the clear went on.
Final Takeaway
When you see ‘tiger stripes’ in clear coat, first decide what you are actually looking at: overlap lines, dry bands, uneven texture, uneven film build, or metallic striping underneath the clear. That diagnosis determines whether the finish can be corrected on the surface or needs to be refinished.
Keep the gun square, keep your motion repeatable, verify dynamic air supply, follow the clear-coat TDS, and stop using fixed internet numbers as universal settings. The goal is not one magic overlap percentage. It is a wet film that stays uniform from the first pass to the last.
FAQ
Are tiger stripes common in clear coat?
The term is more commonly used for metallic or pearl basecoat. In clear coat, painters may be seeing overlap lines, dry spray bands, uneven gloss or uneven film build.
What overlap should I use for clear coat?
There is no universal percentage. Use the gun and coating manufacturer guidance, then verify the pattern and wet edge on a test surface.
Can I buff clear-coat stripes out?
Sometimes, when the difference is mainly surface texture and enough clear remains. Buffing cannot restore missing film thickness or correct metallic striping below the clear.
What are the current PRD-817 specs?
PORPHIS currently lists a 1.3 mm nozzle, 1.3–1.8 bar operating pressure, 15.2 CFM air consumption, 175 ml/min fluid delivery, 150 mm spray distance and 260–350 mm fan width.
Share:
Can You Spray 2K Clear Coat at Home? PPE, Isocyanates and When a Garage Is Not Enough
Match Spray Gun CFM to Air Compressor: PSI, Tank Size & Real Air Demand