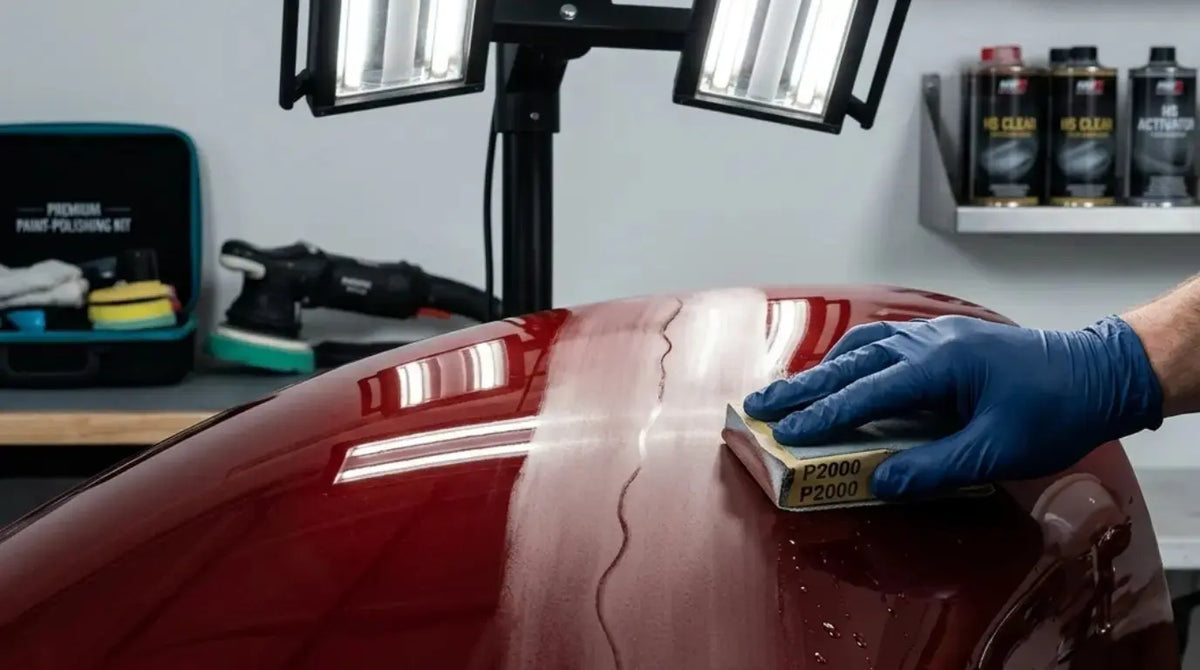
It’s one of the most frustrating moments in auto body work. You’ve laid down what you thought were two solid coats of clear. The base coat looks flawless. Then, under the booth lights, you see them: distinct overlap lines appearing across the panel like ghost stripes. You ask yourself—do I need to repaint, or can this be buffed out?
If this sounds familiar, you’re not alone. The short answer is yes, many clear coat overlap lines can be eliminated with proper wet sanding and machine buffing. But the longer, more useful answer is that preventing these lines in the first place requires the right technique, patience, and—most importantly—the right automotive paint spray gun.
This guide will walk you through the mechanics of overlap lines and tiger stripes in clear coat, how to fix them, and how to ensure your next job lays down smooth from the start.
1. Understanding Overlap Lines and Tiger Stripes in Automotive Clear Coat
Before you can fix a problem, you need to understand its root cause. Overlap lines and tiger stripes in clear coat aren’t random defects—they are predictable outcomes of specific application errors.
Why Overlap Lines Form in Clear Coat Application
Clear coat behaves differently than base coat. Base coat is designed to dry quickly and accept subsequent layers without much flow. Clear coat, by contrast, needs to stay wet long enough to level itself into a smooth, uniform film. When you spray clear coat, every pass you make lays down a ribbon of material.For a closely related finish defect, follow our guide to preventing clear coat runs. The edges of that ribbon—where one pass meets the next—are the most vulnerable points.
Overlap lines form when the clear coat doesn’t flow out completely between passes. This usually happens for three reasons:
-
Insufficient overlap. If your passes overlap by less than 50%, the edges of each pass dry before the next pass can melt into them.
-
Gun distance too far. Holding your spray gun too far from the panel allows atomized clear to partially dry in the air, landing as dry overspray that won’t level.
-
Low air pressure. Without adequate atomization pressure, the fluid droplets are too large and don’t flow together smoothly.
You’ll see overlap lines most prominently on large, flat panels like hoods and roofs, where every pass is visible in the reflection. For the next clear-coat decision in this process, see our guide to clear coat application on large panels. On curved body lines, the natural shifts in light help mask minor application errors—but on flat panels, there’s nowhere to hide.
Tiger Stripes vs. Overlap Lines—What’s the Difference?
While often confused, overlap lines and tiger stripes are distinct defects:
-
Overlap lines appear as visible edges between spray passes—typically vertical or horizontal lines that mirror the direction of your gun movement.
-
Tiger stripes appear as alternating light and dark bands across the panel, usually oriented perpendicular to your spray direction. In clear coat, tiger stripes result from inconsistent film build caused by uneven overlap. Tiger stripes are commonly associated with inadequate overlap and low air pressure.
If you’re seeing tiger stripes in your base coat, the clear coat won’t automatically hide them—it will often magnify the unevenness beneath.
2. Can You Buff Out Overlap Lines? The Straight Answer
Yes, moderate overlap lines can be wet sanded and buffed out. But there are important limits to understand.
When Buffing Will Work (and When It Won’t)
Buffing works when the clear coat has been applied with sufficient thickness—typically a minimum of 3 to 4 mils. Wet sanding removes approximately 0.5 to 1.0 mil of clear coat, so you need enough remaining film for UV protection and durability.
Buffing will work when:
-
The overlap lines are subtle—visible in reflection but not rough to the touch
-
You’ve applied at least two full, wet coats of clear
-
The clear has fully cured (wait 24–48 hours before sanding)
Buffing will NOT work when:
-
The clear coat was applied dry (grainy or rough surface texture)
-
You’ve already buffed through the clear in previous corrections
-
The overlap lines are accompanied by severe orange peel that would require aggressive sanding For a closely related finish defect, follow our guide to zero-orange-peel show-car finish.
In cases of severe dry spray or heavy striping, the proper fix is to let the clear fully cure, sand flat with 800–1000 grit, and respray.
Step-by-Step Wet Sanding and Buffing Process
If your overlap lines are minor-to-moderate, follow this professional correction sequence:
Step 1: Cure Time
Allow the clear coat to cure for at least 24 to 48 hours. High-solids clears may require additional time depending on temperature and hardener specifications.
Step 2: Wet Sanding
Start with 2000-grit wet sandpaper. Soak the paper in water with a few drops of dish soap or a dedicated sanding lubricant for at least 15 minutes before use. Use a soft rubber sanding block—never sand by hand alone, as fingers create uneven pressure. Sand in straight, overlapping passes with light pressure, maintaining a constant supply of water to flush away debris. Stop frequently to wipe the surface and inspect your progress.
If 2000 grit isn’t leveling the lines, step down to 1500 grit, then refine with 2000 or 2500 grit.
Step 3: Compound and Polish
After wet sanding, machine buff with a medium-cut compound using a foam pad at 1200–1500 RPM. Follow with a fine swirl remover and a finishing pad. The goal is to restore gloss progressively—not to remove all your clear in one aggressive pass.
Step 4: Final Inspection
Wipe the panel with isopropyl alcohol to remove polishing oils and inspect under direct sunlight or high-intensity LED lighting. If faint lines remain, repeat the process with finer grits.
Pro tip: If you’re buffing a panel with factory clear adjacent to your repair, use reverse masking to create a soft transition rather than a hard tape line. A soft transition blends much better than an abrupt edge.
3. Prevention Is Better Than Correction—How to Spray Clear Coat Without Overlap Lines
Wet sanding and buffing add hours to every job. The real efficiency comes from getting the application right the first time. Here’s how professional painters achieve streak-free clear coat:
Gun Setup and Overlap Technique
The most common cause of overlap lines is simply not enough overlap between passes. For clear coat, you should overlap each pass by 70 to 75 percent—not the 50 percent often used for base coat. Clear coat is thicker and needs more overlap to ensure wet edges merge completely.
Your first coat should be medium-wet—not a dry dust coat and not a heavy flood coat. Hold the gun square to the panel and maintain a consistent distance of 6 to 8 inches, depending on your gun’s atomization characteristics. Watch the surface behind your spray pattern: it should look continuously wet but still controlled around body lines.
Flash Time and Environmental Control
Flash time is not a fixed number printed on a tech sheet—it’s a dynamic condition that depends on booth temperature, airflow, reducer speed, and film thickness.
Apply the second coat only when the first coat is tacky but not stringing heavily. Applying too early traps solvent, leading to solvent pop or dieback. Waiting too long reduces chemical flow, creating texture and visible layer lines.
For vertical panels, lighten your pressure on edges, character lines, and lower sections where material naturally gathers. For hoods and roofs, maintain smooth arm movement across the full panel instead of bending your wrist at the far end—the slowdown at the end of a pass creates heavy edges.
The Second Coat—Where Gloss Is Made
The second coat should complete the gloss and leveling without drowning the panel. Keep the same pass order and overlap percentage used on the first coat. After application, check reflection lines, edge build, and any developing sag.
A professional clear coat should have uniform gloss, controlled texture, and enough film thickness for later polishing if required.
4. Choosing the Right Paint Sprayer for Flawless Clear Coat
You can have perfect technique and still fight overlap lines if your spray gun isn’t matched to the job. Different clear coats—especially modern high-solids formulations—have specific atomization and air consumption requirements.
HVLP, LVLP, and MP—Which Atomization Technology for Clear?
-
HVLP (High Volume, Low Pressure) systems are the industry standard for clear coat, delivering soft atomization that’s ideal for building gloss without excessive overspray. However, HVLP guns typically require higher CFM (15+), which can be a limitation in smaller shops.
-
LVLP (Low Volume, Low Pressure) technology offers a compelling alternative for clear coat. With softer atomization and transfer efficiency up to 70 percent, LVLP guns produce less overspray and work exceptionally well with high-solids clears at lower air consumption (5–6 CFM).
-
MP (Mid Pressure) guns operate at higher inlet pressures and offer faster application speeds, but they require more skill to control film build on clear coats.
For most professional clear coat applications—especially on production jobs—an HVLP or LVLP configuration with a 1.3mm to 1.4mm fluid tip is the sweet spot.For the next clear-coat decision in this process, see our guide to spot repair and clear coat blending.
Why Dedicated Base and Clear Guns Deliver Better Results
In professional painting, base coat and clear coat have different viscosities and spraying requirements. Using a dedicated paint sprayer for clear allows you to optimize atomization for clear coat, avoid cross-contamination, and improve work efficiency by eliminating frequent cleaning and switching between coats.
A dedicated clear coat gun stays set up for clear, meaning you never risk contamination from residual base coat or primer—and you maintain consistent, repeatable settings job after job.
5. Professional Product Recommendation—PORPHIS PRD-815 for Clear Coat Application
When it comes to achieving a smooth, streak-free clear coat finish, the gun in your hand makes all the difference. The PORPHIS PRD-815 has earned a strong reputation among professional automotive painters as a versatile, high-atomization spray gun that handles clear coat with exceptional control.
The PRD-815 features MP (Mid Pressure) atomization technology with 1.2mm and 1.3mm nozzle options, operating at 23–32 PSI with a moderate air consumption of 10.2 CFM. This balance makes it compatible with a wide range of shop compressor setups while delivering the atomization quality needed for smooth clear coat leveling.
What sets the PRD-815 apart for clear coat application is its refined air distribution—borrowed from higher-tier models—which stabilizes pressure behind the fluid tip. This stable air delivery prevents the erratic turbulence that can cause uneven film build and those dreaded overlap lines.
Professional reviewers have noted that the PRD-815 is the better choice if you need a versatile gun that handles both base coat and clear coat with high atomization quality, and you value precise manual control over spray width.
For body shops and advanced DIY painters who want a dedicated clear coat gun without jumping to the highest price brackets, the PRD-815 delivers professional-grade performance at a compelling value point.
Learn more about the PRD-815 and how it can improve your clear coat results.
6. Final Thoughts—From Overlap Lines to Glass Finish
Overlap lines in clear coat are a rite of passage for every automotive painter. The good news is that most lines can be corrected with careful wet sanding and buffing. The better news is that with proper technique and the right tools, you can prevent them entirely.
Remember the fundamentals:
-
Overlap your clear coat passes by 70–75 percent
-
Keep your gun square to the panel at consistent distance
-
Respect flash times—don’t rush between coats
-
Use a dedicated paint sprayer for clear coat to maintain consistent setup and avoid contamination
And when you’re ready to invest in a tool that makes streak-free clear coat easier to achieve, the PORPHIS PRD-815 is a proven choice that professional painters trust.
Get the right technique down, pair it with the right equipment, and that glass-like finish becomes the rule—not the exception.
7. Frequently Asked Questions
Can you buff out clear coat overlap lines?
Yes, mild to moderate overlap lines can typically be wet sanded with 2000-grit paper and machine buffed. Severe lines or dry spray may require respraying.
What causes tiger stripes in clear coat?
Tiger stripes are caused by inconsistent film build due to insufficient overlap between passes or low air pressure. A 70–75 percent overlap with proper gun pressure will eliminate most tiger striping.
How long should you wait before wet sanding clear coat?
Wait at least 24 to 48 hours for the clear to fully cure. Sanding too early can pull the film or create uneven texture.
Do I need a dedicated paint sprayer for clear coat?
While not strictly required, a dedicated spray gun for clear coat is highly recommended for professional work. It eliminates cross-contamination and allows you to optimize settings specifically for clear without adjustment between jobs.
What’s the best nozzle size for clear coat?
A 1.3mm fluid tip is the most universal size for most base coats and clear coats. For higher-viscosity high-solids clears, a 1.4mm tip may offer better flow.
Share:
7 Clear Coat Tips Every First-Time Automotive Painter Should Know
What Happens If You Clear Over 2000-Grit Sanded Basecoat? The Truth About Scratch Visibility