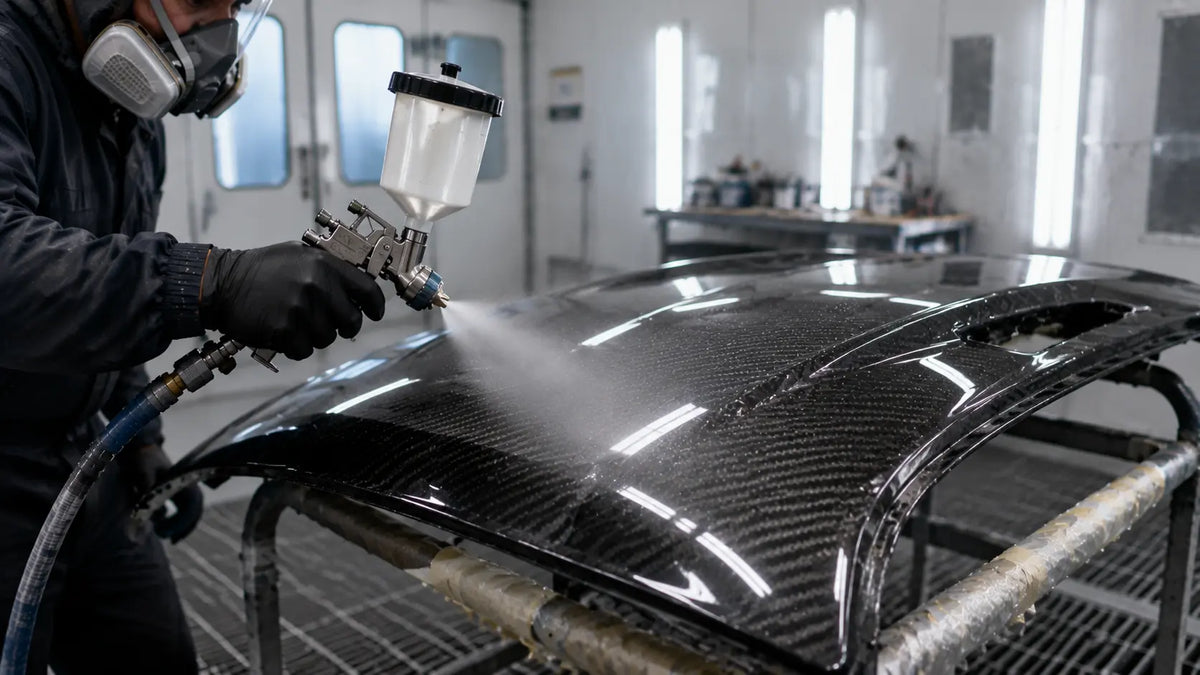
Carbon fiber rewards careful work and exposes careless work. Under bright light, the weave makes every pinhole, sanding mark, dry edge, and patch of orange peel easy to see. That is why the first step is not mixing clearcoat. It is figuring out what surface is already on the part.
A carbon-fiber hood may be finished with a factory clearcoat, a gel coat, a resin-rich surface, or an earlier repair.For the next clear-coat decision in this process, see our guide to removing clear coat from carbon fiber. Those surfaces do not share one universal sanding schedule. Before refinishing, confirm the part manufacturer’s recommendations and the coating system you plan to use.
|
Safety|2K Safety Comes Before Spray Technique Many professional 2K polyurethane clearcoats use isocyanate hardeners.For the next clear-coat decision in this process, see our guide to 2K clear coat safety guide. HSE guidance states that filtering respirators are not suitable for spraying isocyanate paint; air-fed breathing apparatus is required. Use a compliant spray booth, keep unprotected people out of the spray area, and follow the product SDS/TDS and local regulations. |
First, Identify the Surface Condition
|
What you find |
Risk |
Next step |
|
Sound existing clearcoat |
Sanding through an edge can expose the resin or fibers |
Clean, inspect, and abrade only as required by the new clearcoat system |
|
Yellowed, cracked, or peeling clearcoat |
New clear will not stabilize a failing layer |
Remove the failed coating to a stable boundary and reassess the substrate |
|
Pinholes or resin voids |
Clearcoat may bridge the defect and trap air |
Use the repair/sealer process approved for composite parts |
|
Exposed or damaged fibers |
Cosmetic clearcoat is not a structural repair |
Stop and obtain a composite-repair assessment |
|
Unknown coating or release residue |
Adhesion and solvent reaction are unpredictable |
Test, clean with an approved product, and verify compatibility before proceeding |
Why Carbon Fiber Clearcoat Repairs Fail
The Existing Coating Was Not Stable
A new clearcoat only performs as well as the layer beneath it. If the old clear is peeling, chalking, solvent-sensitive, or poorly bonded, sanding and recoating over it can hide the problem temporarily without fixing it.
The Sanding Cut Through the Resin or Weave
Carbon fiber is not a painted steel panel. Once the protective resin is cut through, exposed fibers can absorb contamination and the appearance of the weave can change. Work carefully around edges and high spots, use a soft interface where appropriate, and stop when the coating system—not a generic grit chart—says the surface is ready.
Pinholes Were Covered Instead of Repaired
A glossy wet coat can make pinholes disappear for a moment. They often return during flash or cure because the void is still present. Composite-specific sealers and repair processes exist for this reason; use the one approved by the coating manufacturer.
The Clearcoat Schedule Was Invented
Some clearcoats call for two coats, some for one-and-a-half, and some have product-specific flash rules. A light “tack coat” is not a universal first step. Mix ratio, reducer, hardener speed, coat count, flash time, and bake schedule must all come from the exact TDS.
A Safer, More Reliable Workflow
- Confirm whether the part has existing clearcoat, gel coat, exposed resin, or structural fiber damage.
- Read the clearcoat TDS and SDS before the job. Record the approved substrate, preparation, mix ratio, pot life, flash, and cure schedule.
- Move the job to a compliant spray booth with effective extraction. Use air-fed breathing apparatus and the required gloves, coveralls, and eye/face protection.
- Clean with a product approved for the existing surface. Avoid cleaners that may attack the resin or leave residue.
- Abrade the stable coating only to the finish required by the selected system. Do not cut through edges or expose fibers.
- Repair pinholes or surface defects using a composite-compatible sealer or repair product, then re-inspect under strong side lighting.
- Mix, strain, and spray the clearcoat exactly as specified in its TDS. Do not substitute generic coat counts or flash times.
- Keep respiratory protection in place while spray mist remains in the booth and observe the booth clearance time before unprotected entry.
- Allow the part to cure before handling, polishing, or installing hardware that may stress the coating.
When to Stop and Send the Part to a Specialist
|
Red flag |
Why it matters |
|
Visible broken or lifted fibers |
The problem may be structural, not cosmetic |
|
Large areas of delamination or resin separation |
Clearcoat cannot restore laminate integrity |
|
Unknown coating reacts strongly to cleaner or solvent |
The new system may wrinkle, soften, or lose adhesion |
|
No compliant booth or air-fed respiratory protection |
The chemical exposure cannot be controlled by spray technique or a better gun |
Using the PRD-725 for Clearcoat Application
Once the substrate, coating system, and safety controls are confirmed, the spray gun’s job is to apply a consistent film. The PORPHIS PRD-725 is available with 1.3 mm and 1.4 mm nozzle options, operates at a recommended 22–29 PSI, and is rated at 8.0 CFM air consumption. The 1.3 mm setup is a practical starting point for many automotive clearcoats when the clearcoat manufacturer allows it.
Set pressure dynamically at the gun, make a test pattern, and adjust fluid, distance, speed, and overlap to the material. The correct setting is the one that produces the required film build without dry edges, runs, or excessive overspray. A spray gun is application equipment—not respiratory protection—and it cannot make an incompatible or unsafe coating process acceptable.
Carbon Fiber Clearcoat Job Record
|
Item to record |
|
Existing surface/coating |
|
Clearcoat product and TDS revision |
|
Mix ratio / hardener / reducer |
|
Pot life |
|
Gun / nozzle / dynamic pressure |
|
Coat count and flash times |
|
Booth temperature and cure schedule |
|
Booth clearance time |
Final Takeaway
A durable carbon-fiber clearcoat job begins with restraint. Do not sand until you know what surface you have. Do not spray until the TDS, booth, and respiratory protection are ready. And do not cover a structural composite problem with a cosmetic coating.
Share:
Paint Adhesion Failure on Plastic Parts: Why It Peels and How to Fix It
Paint Adhesion Failure on Plastic Parts: Why It Peels and How to Fix It