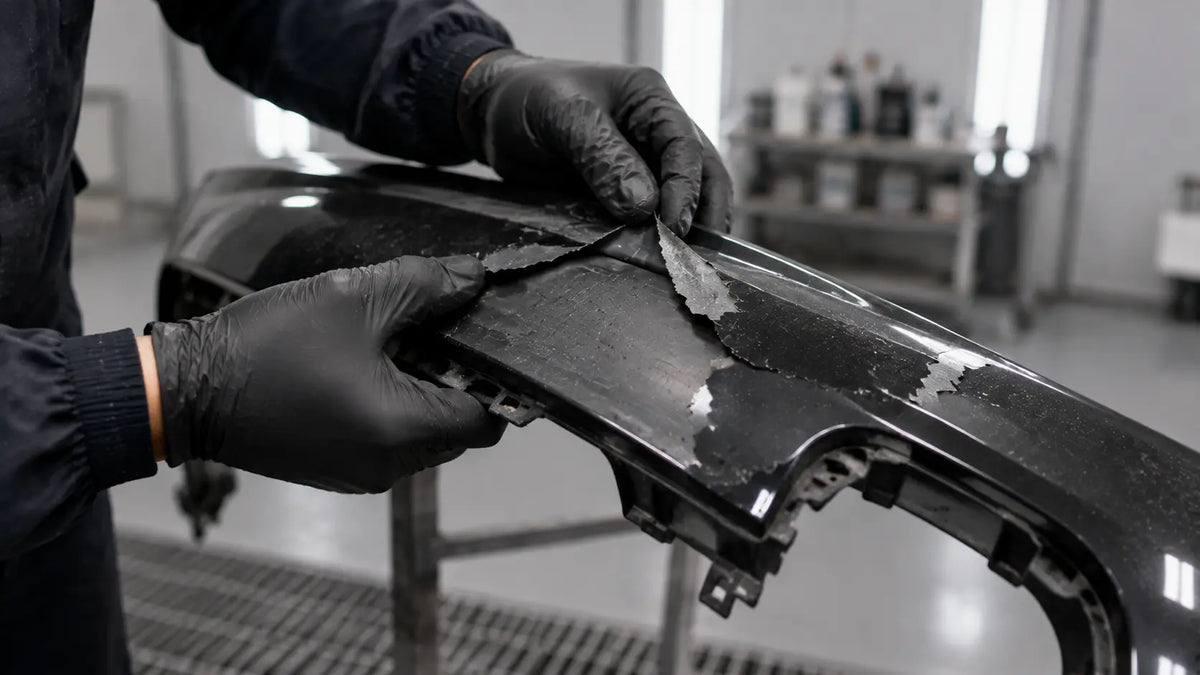
A plastic bumper can look perfect when it leaves the booth and start peeling a few weeks later. For a closely related workflow, see our guide to plastic bumper painting and fender blending .When that happens, the paint is often blamed first. In practice, the failure usually started much earlier—with the wrong assumption about the substrate, incomplete cleaning, or a plastic-prep product used outside its intended process.
The difficult part is that “plastic” is not one surface. A raw polypropylene bumper, a factory-primed replacement cover, and an old painted mirror cap should not automatically receive the same preparation. The safest approach is to identify what is actually on the part, then follow one compatible paint system from cleaning through topcoat.
Start by Identifying the Surface You Actually Have
Before sanding, look for a material code on the back of the part and inspect the front for primer or an existing finish. The code can help identify the plastic family, but the coating condition matters just as much.
|
Surface condition |
What it usually means |
First decision |
|
Raw, uncoated plastic |
Bare plastic is exposed with no verified primer |
Use the cleaner and adhesion-promoter process approved for that plastic and paint system |
|
Factory-primed replacement part |
The part already has a supplier-applied primer |
Confirm the primer is sound and follow the paint maker’s primed-plastic procedure |
|
Previously painted part |
Existing paint is intact, peeling, cracked, or contaminated For the related preparation and adhesion steps, use our guide to diagnosing paint peeling after clear coat |
Remove failed material, feather sound edges, and refinish only over a stable substrate |
Why Paint Peels from Automotive Plastic
1. The Part Was Treated as Bare Plastic When It Was Not—or Vice Versa
An adhesion promoter is commonly specified for unprimed automotive plastics, but it is not a universal extra coat for every surface. Applying it over an unknown or incompatible primer can create another weak layer instead of solving the problem. The product data sheet should tell you where the promoter belongs in the system.
2. Contamination Was Moved Around Instead of Removed
New and used plastic parts can carry mold-release residue, dressing, road film, wax, silicone, fingerprints, and sanding dust. Sanding a dirty part can drive contamination into the scratches. Clean first with a product approved for automotive plastic, use clean towels, and repeat the process when the towel continues to pick up residue.
3. The Abrasive Was Chosen by Habit
There is no single grit that is correct for every plastic operation. Coarse sanding can leave distortion or deep scratches; sanding too fine can reduce the mechanical key required by a particular primer. Use the abrasive grade in the paint or repair-system procedure, especially around texture, edges, and body lines.
4. The Coating Stack Was Not Designed for the Part
A flexible bumper cover moves more than a rigid mirror cap. Some modern refinish products are already formulated for flexible parts; other systems call for an elastic additive in specific layers. Do not add a flex agent by default. Use it only where the coating manufacturer specifies it.
5. Flash Times or Film Build Were Ignored
Heavy promoter, primer, basecoat, or clearcoat can trap solvent and weaken the film. A part can also fail when the next coat is applied outside the approved recoat window. The clock should come from the TDS, not from a generic “five-minute” rule.
A Practical Diagnosis Table
|
What you see |
Likely area to investigate |
What to do next |
|
Paint peels cleanly to bare plastic |
Missing or incompatible plastic-prep step |
Strip failed coating and rebuild with the approved raw-plastic process |
|
Fisheyes or small craters |
Silicone, oil, wax, or cleaner residue |
Stop, clean correctly, and verify the booth and air supply are not recontaminating the part |
|
Cracks after the part flexes |
Brittle coating stack or excessive film build |
Confirm product flexibility and repair according to the coating system |
|
Failure only around edges or corners |
Poor cleaning, thin coverage, or sanding-through at edges |
Feather the area and improve edge preparation and controlled coverage |
|
Blistering after curing |
Trapped solvent, moisture, or contamination |
Remove the failed layer and correct flash, air, and substrate conditions |
A Better Step-by-Step Process
- Identify the plastic and decide whether the surface is raw, factory-primed, or previously painted.
- Wash away water-soluble dirt, then clean with the plastic cleaner or degreaser approved by the paint system.
- Abrade only as directed for that surface. Protect edges, texture, and flexible areas from aggressive sanding.
- Remove dust with clean, dry air and clean towels. Avoid transferring contamination back onto the part.
- Apply adhesion promoter only where the procedure calls for it—normally on exposed, unprimed plastic—and stay inside its recoat window.
- Apply the specified primer or sealer. Add a flexibility product only when the system requires it.
- Apply basecoat and clearcoat at the specified film build, flash time, temperature, and humidity.
- Allow full cure before forcing clips into place or flexing the part during reassembly.
Choosing a Spray Gun for Small Plastic Parts
For mirror caps, trim pieces, small brackets, and localized repairs, a compact gun can be easier to control than a full-size gun. The PORPHIS PRD-510 is an LVLP mini gun with 0.8 mm and 1.0 mm nozzle options, a rated air consumption of 5.7 CFM, and a 120–200 mm spray pattern. That makes it better suited to small parts and controlled repair areas than to a full bumper cover.
For a complete bumper or a large, high-build application, choose a gun and nozzle that match the coating manufacturer’s viscosity and the size of the job. A spray gun can improve film consistency, but it cannot compensate for an incorrect plastic-prep system.
Plastic Paint Prep Checklist
|
Check |
|
Plastic type and surface condition identified |
|
Compatible cleaner and paint system selected |
|
Contamination removed before sanding |
|
Abrasive grade verified in the procedure/TDS |
|
Adhesion promoter used only where specified |
|
Primer/flex additive requirements confirmed |
|
Flash and recoat windows recorded |
|
Part fully cured before reassembly |
Final Takeaway
Plastic adhesion failures are rarely solved by adding more product. The durable repair begins with a correct diagnosis: raw plastic, primed plastic, or a previously painted surface. From there, cleaning, abrasion, adhesion promoter, primer, and topcoat must work as one approved system.
That process is less dramatic than a “secret trick,” but it is what keeps paint on the part after the car leaves the booth, the bumper flexes, and the weather changes.
Share:
How to Clear Coat Carbon Fiber Parts Safely: Prep, 2K Safety, and Spray Technique
How to Clear Coat Carbon Fiber Parts Safely: Prep, 2K Safety, and Spray Technique