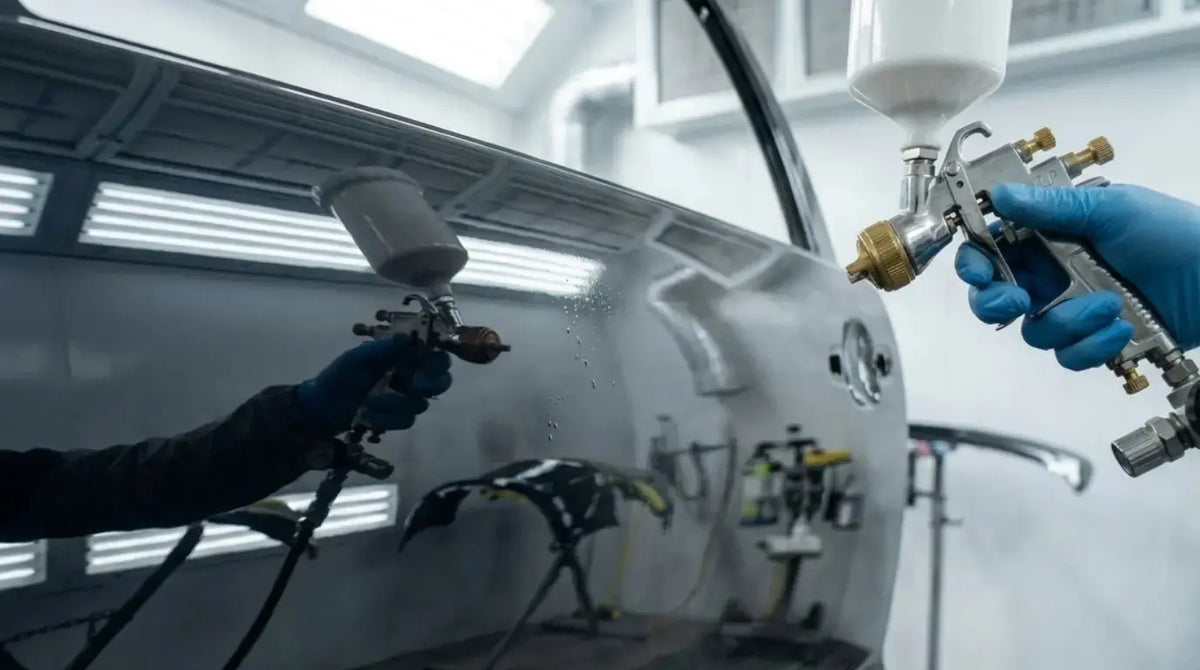
Applying clear coat over massive panels—whether it's a van side, a bus roof, or a large truck hood—presents unique challenges that can test even experienced painters. For model-specific performance, setup, and application context, see our preventing clear coat runs. The sheer surface area amplifies every mistake: runs, dry spots, and uneven coverage become far more noticeable and far more costly to fix.
When clear coat begins to fail across a large panel, the question isn't just how to fix it—it's how to fix it efficiently without compromising quality. This guide breaks down the professional approach to diagnosing, preparing, and respraying clear coat on large panels. For the next clear-coat decision in this process, see our guide to fixing overlap lines in clear coat .
Diagnosing Clear Coat Failure: When to Strip vs. When to Scuff
The first and most critical decision is determining how much of the existing finish needs to be removed. Not all failing clear coat requires a full strip-down.
Signs You Need to Strip Completely
-
Crows-foot cracking: A network of fine cracks resembling a bird's footprint. This indicates the clear has lost all flexibility and must be removed down to the base coat or primer.
-
Delamination: The clear coat is physically separating from the base coat. You can see it peeling or lifting at edges.
-
Severe peeling: Large sections of clear have already detached.
Signs You Can Scuff and Reclear
-
Minor oxidation or hazing: The clear has lost its gloss but is still intact.
-
Light scratches or swirl marks: These can be sanded out and recoated.
-
Localized damage: The clear is failing in small areas but the surrounding paint is sound.
The Professional Approach: "Feather and Blend"
For large panels with localized failure, professionals rarely strip the entire panel. Instead, they:
-
Feather-edge the damaged areas: Sand the failing clear down to a smooth transition where it meets the sound clear.
-
Scuff the surrounding sound clear with 800-1000 grit to create adhesion.
-
Reclear the entire panel to ensure a seamless finish.
This approach saves hours of labor and preserves the factory base coat where it's still in good condition.
Efficient Sanding: Tools and Techniques for Large Panels
Sanding is the most time-consuming part of any large-panel respray. Efficiency is everything, but rushing leads to uneven surfaces and burn-through.
Choose the Right Grit and Tool
-
For stripping failing clear: Start with 320-grit on a dual-action (DA) sander. Wet sanding with 320 is a common approach for controlled removal.
-
For scuffing sound clear: Use 800-grit for a mechanical key.
-
For final prep before clear: Finish with 1000-1500-grit to refine the surface.
Pro Tip: Dry sanding with a DA sander is significantly faster than wet sanding for the initial stripping phase. Switch to wet sanding only for the final refinement stages.
Mesh Sandpaper: A Game-Changer for Efficiency
Mesh sandpaper (also known as net-style or screen sandpaper) is increasingly preferred by professionals for large-panel work. Unlike traditional paper, mesh doesn't clog as quickly with paint dust, and its open structure allows for better dust extraction when used with a vacuum-assisted DA sander. This means less downtime for cleaning or changing paper and a more consistent cut.
The "Walk and Spray" Technique
When you're ready to apply clear, the technique matters as much as the gun setup. For large panels:
-
Walk the panel rather than reaching or leaning. This keeps your gun distance consistent.
-
Spray horizontally in straight, overlapping passes. This minimizes material waste and reduces the chance of runs compared to vertical passes.
-
Maintain a 50% overlap to ensure even coverage.
Why Your Spray Gun is the Critical Factor
On a small panel, a mediocre spray gun might still produce acceptable results with enough patience. On a large panel, a poor gun will magnify every flaw—uneven atomization leads to tiger striping, orange peel, and dry spray that becomes painfully obvious across a vast surface. For model-specific performance, setup, and application context, see our zero-orange-peel show-car finish.
What to Look For in a Gun for Large Panels
-
Superior atomization: To ensure a consistent, fine mist across the entire spray pattern.
-
Adequate fan width: A wider fan pattern covers more surface per pass, reducing the number of passes and the risk of overlap lines.
-
Consistent delivery: The gun must deliver the same spray pattern from the start of a pass to the end, without sputtering or tapering off.
-
Comfort and balance: You'll be holding this gun for extended periods. A lightweight, well-balanced gun reduces fatigue and improves technique.
For large-panel clear coat application, the PORPHIS PRD-817 is an outstanding choice. Here's why it's engineered for this demanding task:
-
Superior VS Atomization: The Very Smooth atomization design produces an exceptionally fine and even spray pattern. This ensures that clear coat lays down uniformly across massive surfaces, eliminating the tiger striping and uneven texture that plague large-panel jobs.
-
Optimized for Clear Coats: With a 1.3mm nozzle and recommended 18‑26 PSI inlet pressure, the PRD‑817 is precisely calibrated for high‑solids clear coats. This allows you to apply a consistent, controlled film that flows out and levels perfectly, even when covering a van side or truck roof.
-
Professional Build for Extended Use: The lightweight, ergonomic design reduces fatigue during long spraying sessions, allowing you to maintain the consistent technique required for a flawless large-panel finish.
The Professional Process: Step-by-Step
Step 1: Assessment and Masking
-
Identify all areas of clear coat failure.
-
Mask off adjacent panels and trim. For large panels, invest time in thorough masking—overspray on a large vehicle is difficult to correct.
Step 2: Stripping and Feathering
-
Use 320-grit on a DA sander to strip failing clear down to the base coat or primer.
-
Feather-edge the transition between stripped and sound areas.
-
Stop sanding when you have a smooth, uniform surface. Do not over-sand into the base coat.
Step 3: Scuffing the Sound Areas
-
Scuff all surrounding sound clear coat with 800-grit to create a mechanical key.
-
For the entire panel, a final pass with 1000-1500-grit ensures a refined surface.
Step 4: Clean and Degrease
-
Wash the panel thoroughly with soapy water.
-
Follow with a high-quality silicone remover to eliminate contaminants.
Step 5: Apply Clear Coat
-
Mix your clear coat according to the manufacturer's specifications. Use a slow reducer for large panels to allow more flow-out time.
-
Apply a light tack coat to build a foundation.
-
Apply 2-3 full build coats, allowing proper flash-off time between each.
-
Maintain consistent gun distance (6-8 inches) and a steady pace.
-
Walk the panel and spray horizontally for even coverage.
Step 6: Curing and Polishing
-
Allow the clear to cure fully (typically 24-48 hours).
-
Wet-sand with 1500-2000-grit if needed, then compound and polish to a high gloss.
Common Mistakes to Avoid
1. Rushing the Flash-Off Time
On large panels, it's tempting to apply coats quickly to "get it done." However, insufficient flash-off time between coats traps solvents and leads to solvent pop—bubbles in the clear that ruin the finish.
2. Inconsistent Gun Distance
As you walk a large panel, it's easy to drift closer or further from the surface. Even slight variations in distance change the film thickness, leading to a patchy appearance.
3. Over-Reducing the Clear
Using too much reducer to improve flow on a large panel can cause the clear to run or sag. Always follow the manufacturer's mixing ratios.
4. Using the Wrong Reducer for the Temperature
Hot conditions require a slower reducer to prevent the clear from flashing off before it levels. Cold conditions require a faster reducer. Using the wrong one is a common cause of orange peel and dry spray.
Frequently Asked Questions
Q1: Can I just scuff the whole panel and reclear without stripping the failing areas?
A: No. Failing clear that is cracking or peeling must be stripped. Applying new clear over failing clear will not solve the problem—the new clear will eventually fail as the old clear continues to degrade.
Q2: What grit should I use to scuff clear coat before recoating?
A: Use 800-grit for a mechanical key, followed by 1000-1500-grit for a smooth finish. Avoid going finer than 1500-grit, as the clear may not have enough "tooth" to adhere properly.
Q3: How many coats of clear should I apply on a large panel?
A: A minimum of 2-3 full coats. The first coat is a tack coat; the subsequent coats are build coats that create the necessary film thickness for durability and gloss.
Q4: Why is my clear coat drying with a rough texture on large panels?
A: This is often due to the clear flashing off too quickly before it can level. Use a slower reducer, ensure your gun is at the correct distance, and consider adding a retarder to extend flow-out time.
Final Verdict
Respraying clear coat over massive panels is a demanding but achievable task. The key to efficiency and quality lies in making smart decisions about what to strip versus what to scuff, using the right sanding tools and techniques, and—most importantly—equipping yourself with a professional-grade spray gun that delivers consistent, superior atomization across the entire surface.
By following the professional process and using a tool like the PORPHIS PRD-817, you can achieve a factory-quality finish on even the largest panels, saving time and avoiding the frustration of re-dos.
Share:
Is P1500 Grit Sanding Enough for 2K Clear? The Truth About Surface Prep
HVLP Finish Inconsistency: Why Your Paint Job Looks Uneven and How to Fix It