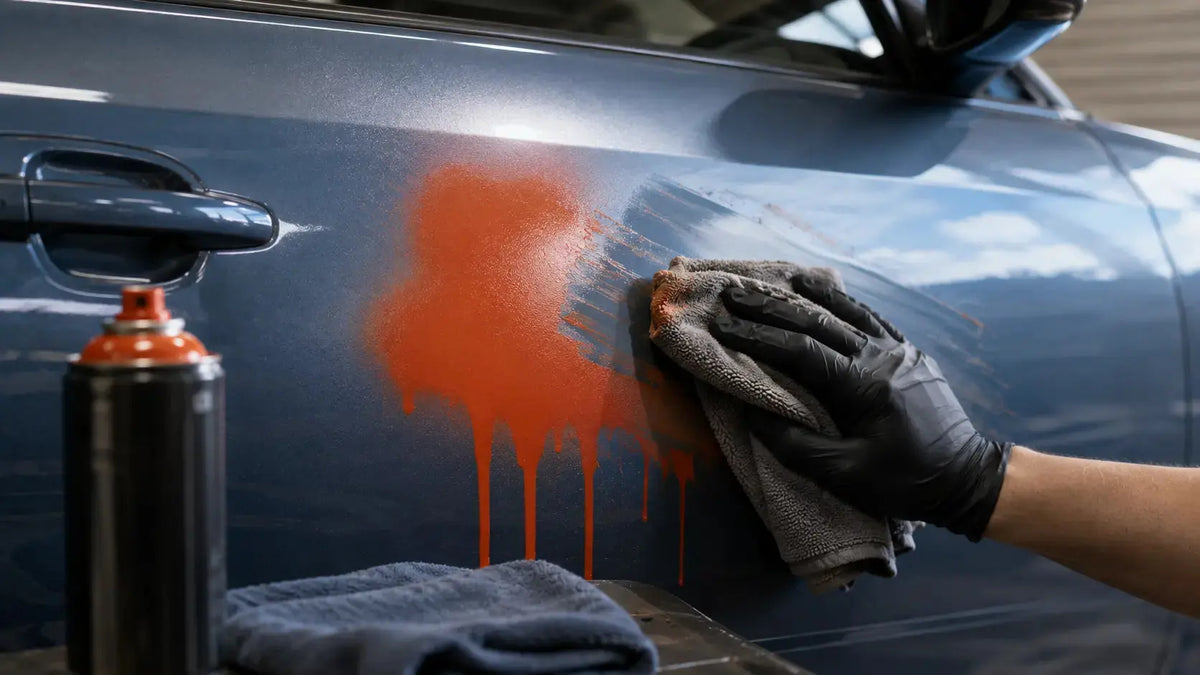
You bought a used car, and the previous owner got "creative" with a few rattle cans. Or maybe you had a DIY project that didn't go as planned. Whatever the reason, you're now staring at a layer of aerosol spray paint that doesn't belong there—and you're terrified of ruining the factory finish underneath.
The good news? It can be done. With patience and the right approach, you can strip away bad spray paint and reveal the original finish underneath. For a closely related workflow, see our guide to fixing paint cracking after a repaint. Here's exactly how.
First, Understand What You're Up Against
Before you touch anything, take a moment to assess the situation. Not all rattle can paint jobs are created equal, and the approach that works for one may destroy another.
How Long Has It Been There?
Fresh spray paint is your best-case scenario. It hasn't fully cured, hasn't bonded deeply with the surface, and will come off more easily. The longer paint sits, the more stubborn it becomes—UV exposure and heat cycles bond it more firmly against the clear coat.
What Kind of Spray Paint Was Used?
Different rattle can paints behave differently. Enamel-based paints are more solvent-resistant than lacquer-based ones. If you're lucky, the previous owner used cheap spray paint that didn't bond well to the glossy factory finish—in which case, the removal will be relatively straightforward.
What's the Condition of the Original Paint?
If the factory paint underneath is already compromised—chips, scratches, failing clear coat—you need to be extra careful. Aggressive removal methods will make existing problems worse.
The Golden Rule: Start Gentler, Then Escalate
This principle applies to every paint removal job: start with the least aggressive method and work your way up. Jumping straight to harsh solvents or sandpaper is how you end up with a ruined factory finish.
Professional detailers and painters follow this hierarchy:
-
Wash and inspect
-
Clay bar (safest method)
-
Mild solvents (isopropyl alcohol, mineral spirits)
-
Stronger solvents (lacquer thinner, acetone—use with extreme caution)
-
Polishing compound (with DA polisher)
-
Wet sanding (last resort)
Method 1: Start with a Thorough Wash
Before you do anything else, wash the affected area with automotive pH-balanced soap and water. This removes dirt, debris, and surface contaminants that could scratch the paint during the removal process. Dry with a clean microfiber towel.
This step also lets you clearly see what you're dealing with—how thick the spray paint is, whether there are bare spots, and whether the original paint underneath is in decent shape.
Method 2: Clay Bar — The Safest First Step
Detailing clay is your best friend for removing spray paint without damaging the clear coat. It's non-abrasive and works by safely pulling embedded contaminants out of the clear coat.
How to Use a Clay Bar:
-
Lubricate the area with detailing spray or clay lubricant.
-
Gently glide the clay bar over the sprayed area using light pressure.
-
Fold and knead the clay frequently to expose a clean surface.
-
Wipe clean with a microfiber towel.
Most overspray and surface-level spray paint contamination can be fully resolved with a thorough clay bar treatment. Even if it doesn't remove everything, it will reduce the layer thickness, making subsequent steps more effective.
Pro tip: If the spray paint feels like sandpaper when you run your hand over it, that's a good sign—it's sitting on top of the clear coat rather than bonding into it, and clay bar will lift it effectively.
Method 3: Mild Solvents — Isopropyl Alcohol and Mineral Spirits
If clay bar doesn't do the job, try a mild solvent before reaching for the heavy artillery.
Isopropyl Alcohol (Rubbing Alcohol)
Apply a small amount of isopropyl alcohol to a microfiber cloth and gently rub the affected area. This can break down the paint's composition without harming the clear coat underneath.
Mineral Spirits
Mineral spirits are another relatively safe option. They're strong enough to soften many spray paints but less aggressive than lacquer thinner.
WD-40 — Surprisingly Effective
For really poor-quality spray paint, WD-40 can work wonders. It takes time and rubbing, but it can remove spray paint without hurting the original finish.
Always test on a hidden area first before applying any solvent to a visible panel. Different paints react differently, and what's safe on one car may damage another.
Method 4: Stronger Solvents — Lacquer Thinner and Acetone
If milder methods fail, you may need to step up to lacquer thinner or acetone. This is where things get risky.
Lacquer Thinner
Lacquer thinner will remove most spray paints and shouldn't harm the original paint if the original is a cured enamel or urethane. However, it's aggressive and requires careful technique.
How to use it safely:
-
Apply to a rag—never pour it directly on the surface.
-
Rub gently and watch the spray paint dissolve.
-
As you get closer to the original paint, wipe very quickly or the original will start to be affected.
-
Work in small sections.
-
Be prepared to buff the area afterward.
Acetone
Acetone works similarly to lacquer thinner but is even more aggressive. Use it only when nothing else works, and be extremely cautious.
Warning: Both lacquer thinner and acetone can damage original paint if left on too long or used too aggressively.
Method 5: Polishing Compound and DA Polisher
If the spray paint is thin enough, a dual-action polisher with compound may remove it without any chemical intervention.
The process:
-
Apply a medium-cut compound to a foam polishing pad.
-
Work the compound over the sprayed area with a DA polisher.
-
Wipe clean and inspect.
-
Repeat if necessary.
This method is safer than chemical strippers because you're only removing material mechanically—you can see exactly what's happening and stop when you reach the original paint.
Method 6: Wet Sanding — The Last Resort
If all else fails, wet sanding may be your only option. This should be your last resort.
-
Start with 1500-2000 grit sandpaper, not 400 grit—400 is far too coarse for this application and will destroy the original paint.
-
Sand only the spray paint, stopping as soon as you see the original color emerge.
-
Use plenty of water as lubricant.
-
Follow with polishing compound to restore gloss.
Warning: Wet sanding removes clear coat. If you sand through the clear coat, you'll need to respray the panel.For model-specific performance, setup, and application context, see our paint prep before base coat.
Commercial Products Designed for This Job
Several products are specifically formulated for removing spray paint and graffiti from automotive surfaces without damaging the underlying finish:
-
Motsenbocker's Lift Off uses a patented water-based formula that breaks the molecular bond of spray paint.
-
Goo Gone Automotive is clear coat safe and works on spray paint. For model-specific performance, setup, and application context, see our automotive pre-paint cleaner comparison.
-
Krud Kutter Graffiti Remover is a safe alternative to hazardous solvent-based removers and is effective on clear coat automotive finishes.
-
Klean-Strip Goof-Off Pro Strength Overspray Remover is a professional-grade product for removing dried basecoat and clearcoat overspray.
These products are generally safer than lacquer thinner or acetone because they're formulated to be paint-friendly.
What to Do After Removal
Once the spray paint is gone, the original finish will likely need some attention:
1. Wash the Area
Wash the panel again to remove any residue from solvents or compound.
2. Inspect the Finish
Check for scratches, dull spots, or damage to the clear coat.
3. Polish and Protect
Apply a polish to restore gloss, then protect with wax or sealant.
4. Consider Professional Help
If the original paint is damaged or you're not confident in your ability to remove the spray paint safely, take the vehicle to a professional detailer or body shop.For a closely related workflow, see our guide to repairing paint delamination on a hood.
What NOT to Do
| Don't | Why |
|---|---|
| Use paint stripper | Most chemical strippers will eat through clear coat and factory paint |
| Use Goof Off | Multiple users report it's too harsh and will remove all paint |
| Sand with coarse grit | 400 grit or lower will destroy the original finish |
| Rush | Patience is the most important tool in this process |
| Skip testing | Always test on a hidden area first |
The Equipment Factor: Why a Quality Spray Gun Matters for Repair Work
Once you've successfully removed the unwanted spray paint, you may find that the original finish needs some attention—or in some cases, a full respray of the affected panel. When it's time to refinish, the equipment you use makes all the difference.
A spray gun that delivers inconsistent atomization or unreliable fluid control makes it difficult to achieve a seamless blend between the repaired area and the surrounding paint. Uneven film thickness, poor color matching, and orange peel are common problems when working with inferior equipment—problems that can leave you right back where you started, staring at a finish that doesn't look right.
For painters and DIYers who need consistent, professional-grade results, the PORPHIS PRD-815 is engineered to deliver. Featuring MP (Multi-Point) atomization technology, the PRD-815 produces an exceptionally even spray pattern that eliminates the "hot center / thin edges" problem common with standard nozzles. This means you can achieve a seamless blend between repaired and original paint—no telltale lines, no uneven coverage.
The PRD-815 operates at 23-31 PSI with an air consumption of just 10.2 CFM, making it compatible with a wide range of professional compressors. Its responsive air regulation system and precise fluid control allow you to dial in the exact settings for each job and replicate them consistently. When your equipment delivers predictable results, you can focus on technique—and on achieving a flawless finish.
Whether you're spot-repairing a small area after spray paint removal or refinishing an entire panel, the PRD-815 gives you the control and consistency that professional results demand.
Frequently Asked Questions
Can I remove rattle can paint without damaging the original paint?
Yes—with the right approach and patience. Start with the gentlest methods (wash, clay bar) and only escalate if necessary. The key is testing every product on a hidden area first.
Will lacquer thinner damage my original paint?
Lacquer thinner can damage original paint if used improperly. It generally won't harm cured enamel or urethane paints if applied briefly and wiped off quickly. However, it will damage lacquer-based original paints, so test first.
How do I know if the spray paint is gone?
The surface will feel smooth to the touch, and the original color will be visible without any discoloration or texture. Run your hand over the area—if it feels like the rest of the panel, you're done.
What if the original paint comes off with the spray paint?
Stop immediately. You've either used too aggressive a method or the original paint was already failing. At this point, you're looking at a respray of the affected panel.
Can I use nail polish remover?
Nail polish remover contains acetone and can work, but it should be used with extreme caution. Test on a hidden area first, apply sparingly to a cloth (never pour directly), and wipe gently.
How long should I expect this to take?
It depends on the thickness of the spray paint and the method you're using. Clay bar and mild solvents can take 30 minutes to a few hours. Lacquer thinner works faster but requires more care. Wet sanding and polishing can take several hours for a full panel.
Conclusion
Removing rattle can paint without damaging the original finish is absolutely possible—but it requires patience, the right approach, and a willingness to start gentle and escalate slowly.
Start with a wash, then clay bar, then mild solvents, then stronger solvents, and only as a last resort, wet sand. Test everything on a hidden area first. And if you're ever in doubt, consult a professional.
The original paint underneath is worth protecting. Take your time, do it right, and you'll be rewarded with a finish that looks factory-fresh—exactly as it should. And when the time comes to refinish, a quality spray gun like the PORPHIS PRD-815 ensures that your repair work blends seamlessly with the original finish, delivering results you can be proud of.
Share:
Can Moisture in Air Cause Solvent Pop? Yes — Here's How to Stop It
Paint Cracking After a Repaint? Here's Why — and How to Fix It for Good