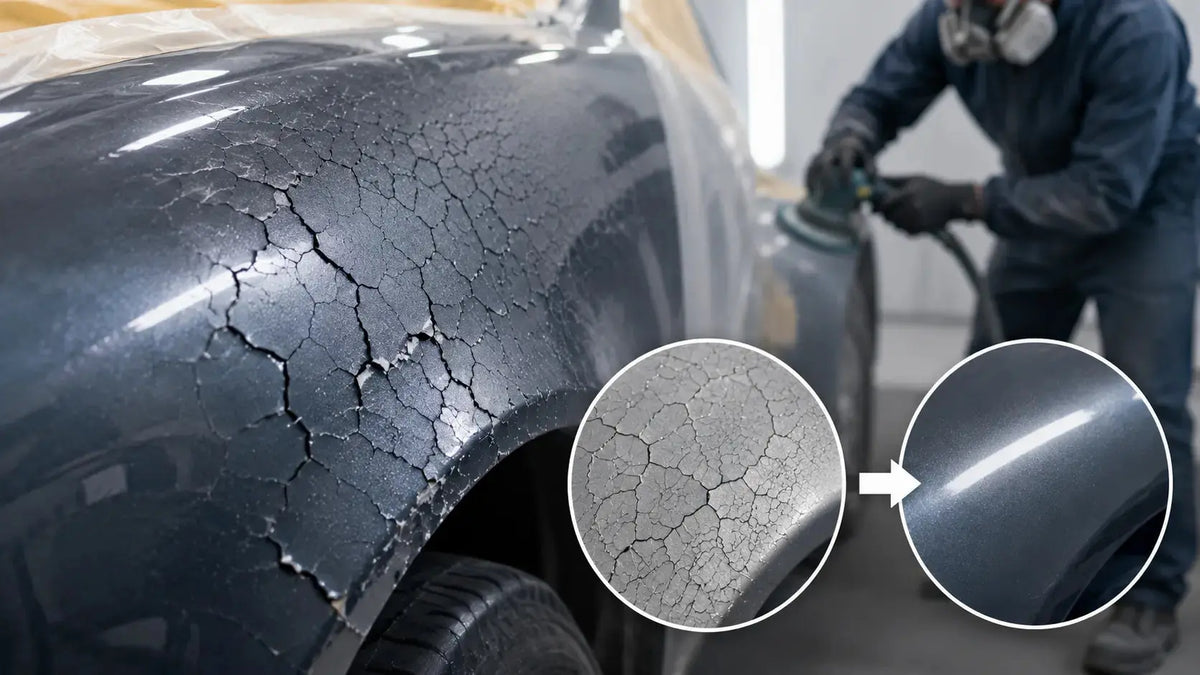
You've just finished a refinish job, stepped back to admire the fresh gloss, and everything looks perfect. Then, weeks or months later, you spot it: a network of fine lines spreading across the panel like cracks in dry earth. Or worse — a single jagged fracture that seems to have appeared overnight.
Paint cracking is one of the most frustrating defects in automotive refinishing. Unlike runs or orange peel, which you can usually sand and polish out, cracking often means stripping the panel and starting over. But here's the good news: cracking is almost always preventable. Understanding why it happens is the first step to making sure it never happens to your work.
What Does Paint Cracking Look Like?
Paint cracking can appear in several forms, and identifying the type helps you diagnose the cause:
-
Crazing / checking: A network of fine, spider-web-like lines across the surface. The cracks are typically shallow and confined to the topcoat.
-
Crow's feet: Larger, spreading cracks that radiate outward from a central point, resembling a bird's footprint.
-
Line cracks: Long, straight or slightly wavy fractures that follow the contours of the panel.
-
Alligatoring: Large, deep cracks that resemble reptile scales, often indicating severe film failure.
The appearance tells you something about the severity. Fine crazing may be limited to the clearcoat, while alligatoring usually means the entire paint build has failed.
What Causes Paint Cracking After a Repaint?
Paint cracking is almost always the result of one of three things: inadequate preparation, incompatible materials, or excessive film build. Let's break down each one.
1. Inadequate Surface Preparation
This is the single most common cause of cracking. If the surface isn't properly prepared, the new paint can't establish a stable bond — and cracking is just one of the many problems that follow.
What goes wrong:
-
Sanding with grit that's too coarse or too fine: Coarse scratches left in the substrate can telegraph through the new paint and create stress points where cracks start. Too fine a grit, on the other hand, leaves the surface too smooth for the new paint to grip mechanically, leading to adhesion failure that manifests as cracking.
-
Inadequate cleaning: Dust, dirt, wax, grease, or silicone left on the surface creates a barrier between layers. When the paint cures and contracts, that contaminated layer becomes a weak point that splits open.
-
Old paint not properly feathered: If you're painting over existing paint that has cracks or damage, those cracks will eventually telegraph through the new paint unless they're completely sanded out.
The fix: Never shortcut surface prep. Sand with the correct grit sequence for your substrate, clean thoroughly with wax and grease remover before and after sanding, and always feather-edge any existing damage until you reach stable, sound paint. For the related preparation and adhesion steps, use our guide to basecoat wrinkling at a feather edge.
2. Incompatible Materials
Not all automotive paints play well together. When you mix products from different manufacturers — or even different product lines from the same manufacturer — you risk chemical incompatibility.
What goes wrong:
-
Solvent attack: Aggressive solvents in a new topcoat can penetrate and soften an older, less-resistant paint layer. As the solvents evaporate and the new paint shrinks during curing, the softened underlying layer can't support the收缩, and cracking results.
-
Incompatible hardeners or reducers: Using the wrong thinner or hardener for your paint system can alter the curing process, leading to excessive shrinkage and cracking.
-
Mixing different resin systems: Applying a polyester-based product over an acrylic, or a 2K urethane over an incompatible 1K base, can create intercoat stress that eventually fractures.
The fix: Stick with a complete paint system from a single manufacturer — primer, basecoat, and clearcoat should be designed to work together. If you must mix systems, test compatibility on a scrap panel first.
3. Excessive Film Build
Every coat of paint adds thickness — and thickness adds stress. When the total film build exceeds what the system can handle, that stress eventually releases as cracking.
What goes wrong:
-
Too many coats: Applying more coats than recommended by the manufacturer.
-
Coats applied too heavy: Each coat is thicker than it should be, rapidly building film thickness. For the related preparation and adhesion steps, use our guide to diagnosing paint peeling after clear coat.
-
Not allowing proper flash time: Rushing between coats traps solvents, which later escape and create stress fractures.
-
Using incompatible primers and topcoats: Some primers are designed to be applied thin; building them too thick can create a brittle layer that cracks under the topcoat.
The fix: Follow the manufacturer's recommended number of coats and film thickness. Use a wet-film thickness gauge if you're unsure. And never rush flash times — they're there for a reason.
4. Environmental Factors
While less common in a controlled booth environment, environmental factors can still contribute to cracking:
-
Extreme temperature changes: Rapid expansion and contraction of the substrate and paint film can cause cracking, especially if the paint is brittle.
-
Excessive UV exposure: Over time, UV radiation breaks down the resin in paint, making it brittle and prone to cracking.
-
High humidity during application: Moisture trapped in the film can create weak points that later crack.
The fix: Paint in a controlled environment. If you're working outdoors or in a non-climate-controlled space, monitor temperature and humidity closely and adjust your reducers accordingly.For the related preparation and adhesion steps, use our guide to repairing paint delamination on a hood.
5. Substrate Movement or Damage
Paint is rigid; the substrate underneath often isn't. When the panel flexes — from temperature changes, impact, or normal vehicle operation — the paint must flex with it. If the paint is too brittle or the film is too thick, it cracks instead.
What goes wrong:
-
Painting over flexible plastics without a flex agent: Bumper covers and other plastic panels need a flex additive in the paint to accommodate movement.
-
Repairing over body filler that wasn't fully cured: Body filler continues to shrink as it cures; if you paint over it too soon, the shrinkage can crack the paint.
-
Structural movement: A panel that flexes more than the paint can handle will eventually crack the finish.
The fix: Use the correct materials for the substrate. Add flex agent when painting plastic parts. Allow body filler to fully cure before applying primer and paint. For the related preparation and adhesion steps, use our guide to paint adhesion failure on plastic parts. And if a panel is structurally compromised, repair it before refinishing.
How to Diagnose the Specific Cause
Before you start sanding, take a moment to look at the cracking pattern — it will tell you what went wrong:
| Crack Pattern | Likely Cause |
|---|---|
| Fine spider-web lines in the clearcoat only | Excessive clearcoat thickness, or clear applied too dry |
| Cracks that follow sanding scratches | Inadequate sanding grit progression or coarse scratches not filled |
| Cracks originating from edges or tape lines | Poor feather-edging or solvent trapped at edges |
| Cracks over body filler areas | Filler not fully cured, or filler applied too thick |
| Cracks on flexible plastic parts | No flex agent used, or incompatible materials |
| Wide, deep cracks (alligatoring) | Severe film build or incompatible layers |
How to Fix Paint Cracking
Step 1: Assess the Damage
-
If the cracking is shallow and confined to the clearcoat: You may be able to sand and reclear. Block sand with 600-800 grit until the cracks are gone, then reclear.
-
If the cracking extends into the basecoat or primer: You'll need to strip the panel down to a stable layer. This means sanding through the cracked paint until you reach sound, well-adhered substrate — whether that's primer, sealer, or bare metal.
Step 2: Remove All Unstable Paint
Don't try to spot-repair cracking. If one area is cracking, the surrounding paint is likely stressed too. Strip the entire affected panel or section back to a stable surface.
Step 3: Prep the Surface Properly
-
Clean thoroughly with wax and grease remover.
-
Sand with the correct grit for your substrate.
-
Apply sealer or primer if needed, following the manufacturer's recommended film thickness.
Step 4: Repaint with Care
-
Use a complete, compatible paint system.
-
Apply the recommended number of coats at the recommended thickness.
-
Respect flash times between coats.
-
Use the correct reducer for the ambient temperature.
Preventing Paint Cracking: A Pro's Checklist
Before you start your next refinish job, run through this checklist:
| Checkpoint | Action |
|---|---|
| Surface prep | Clean thoroughly, sand with correct grit sequence, feather-edge all damage |
| Material compatibility | Use a complete system from one manufacturer |
| Film thickness | Follow manufacturer's recommended number of coats and mil thickness |
| Flash times | Never rush between coats |
| Reducer | Use the correct reducer for ambient temperature |
| Substrate | Use flex agent on plastic parts; ensure filler is fully cured |
| Environment | Paint in a controlled booth with proper temperature and humidity |
The Equipment Factor: Why Your Spray Gun Matters for Preventing Cracking
Cracking is often the result of inconsistent film thickness — heavy spots that trap solvents and create stress points, thin spots that can't support the surrounding film. A spray gun that delivers uneven atomization makes it nearly impossible to achieve uniform film build.
For painters who demand consistent, predictable results across the entire refinish process — from primer through clearcoat — the PORPHIS PRD-515 is engineered to deliver. Featuring MP (Multi-Point) atomization technology and a versatile 1.3/1.8mm nozzle set, the PRD-515 produces an exceptionally even spray pattern that eliminates the "hot center / thin edges" problem common with standard nozzles. The result is uniform film thickness across the entire panel — no heavy spots waiting to trap solvents and create stress fractures.
The PRD-515 operates at 23-31 PSI with an air consumption of just 10.2 CFM, making it compatible with a wide range of professional compressors. Its patented fluid adjustment system allows for precise quantitative control of material output — essential for maintaining consistent film build and avoiding the excessive thickness that leads to cracking.
Whether you're spraying primer, basecoat, or clearcoat, the PRD-515 gives you the control and consistency that professional results demand. When every coat goes down at the right thickness, cracking doesn't stand a chance.
Frequently Asked Questions
Why does paint crack months after a repaint?
Delayed cracking usually points to excessive film build or incompatible materials. The stress in the film builds gradually as the paint fully cures and shrinks — eventually, it exceeds the film's tensile strength and cracks.
Can I fix cracked paint by just sanding and buffing?
Only if the cracking is extremely shallow and confined to the clearcoat. In most cases, cracking extends through multiple layers, and the only proper fix is to strip and repaint.
Does using a cheaper paint increase the risk of cracking?
Yes. Lower-quality paints often have less flexibility and lower tensile strength, making them more prone to cracking. They may also have less consistent curing properties.
How can I tell if my primer is compatible with my topcoat?
Check the technical data sheets for both products. If you're unsure, do a test panel — apply the primer and topcoat to a scrap piece and let it cure fully, then check for cracking or other defects.
Is cracking always the painter's fault?
Not always. Environmental factors like extreme temperature changes and UV exposure can cause cracking over time. But in fresh repaints — especially within the first year — the cause is almost always preparation, material, or application error.
Can humidity during painting cause cracking?
Indirectly, yes. High humidity can slow solvent evaporation, trapping solvents in the film. Those trapped solvents later escape, creating stress that can lead to cracking.
Conclusion
Paint cracking after a repaint is frustrating — but it's also preventable. The difference between a finish that lasts and one that fails comes down to four things: preparation, compatibility, film thickness, and technique.
Prep the surface properly. Use compatible materials from a single system. Apply the right number of coats at the right thickness. And respect your flash times.
When you get these fundamentals right, cracking doesn't stand a chance. And when your equipment supports you with consistent atomization and precise fluid control — like the PORPHIS PRD-515 — you have everything you need to lay down a flawless, crack-free finish every time.
Share:
How to Remove Rattle Can Paint Without Damaging the Original Paint
Clear Coat Over Bare Metal: Why It's a Bad Idea and What to Do Instead