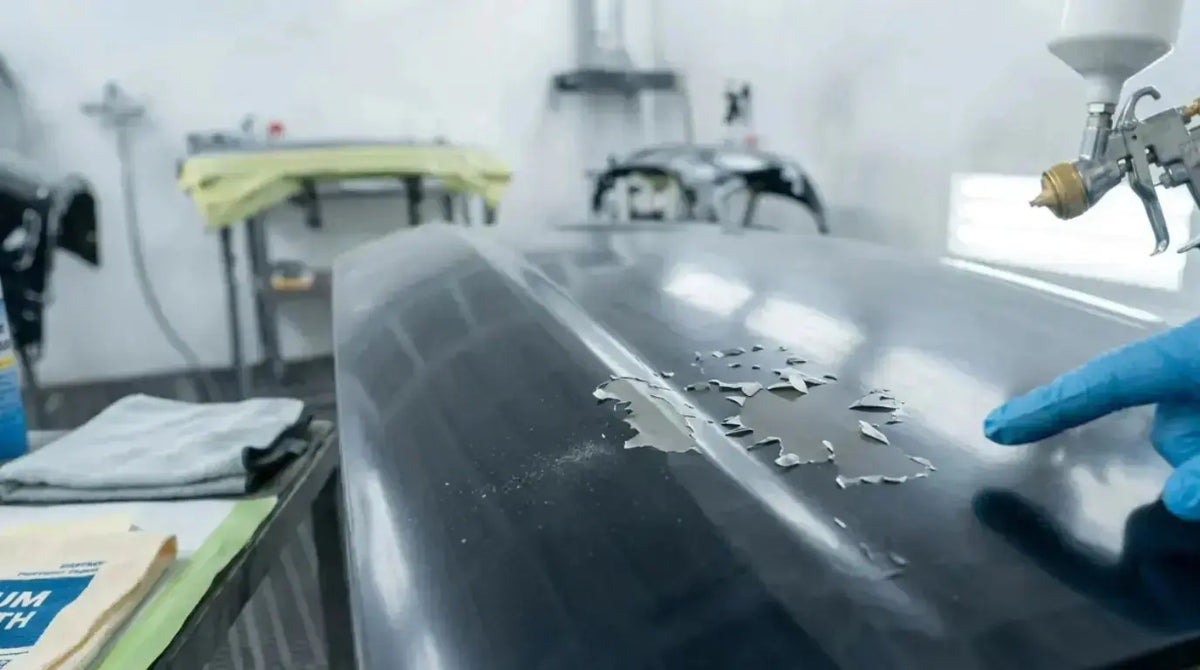
There's nothing quite like watching a fresh paint job lift off the panel like cheap decal film. You followed the steps—sanded, cleaned, sprayed, cleared—and yet, two months later, the finish is peeling. If this sounds familiar, you're dealing with one of the most common—and preventable—failures in automotive refinishing.
This guide breaks down exactly why paint loses adhesion after a repaint, how to diagnose the specific failure point, and most importantly, how to repair it so it stays repaired.For the related preparation and adhesion steps, use our guide to fixing paint cracking after a repaint.
What Causes Automotive Paint to Peel After a Repaint?
Paint peeling occurs when adhesion between layers—or between the paint and the substrate—fails. In nearly every case of premature peeling, the root cause is preparation failure, not a defect in the paint itself.
Three culprits account for the vast majority of adhesion failures:
1. Inadequate Surface Abrasion
Not all sanding is good sanding. If the surface isn't abraded sufficiently, new paint has nothing to mechanically "bite" into. Using too fine a grit—say, 400-grit on a surface that needed 320—leaves the substrate too smooth for proper adhesion. The result is a finish that looks flawless for a few weeks, then peels at the first sign of thermal cycling or stone impact.
The fix: Match your sanding grit to the substrate and coating system. For most refinish work over existing paint, 320-400 grit is a starting point—but edges and tight areas require extra attention. When adhesion fails, it almost always starts at an improperly sanded edge.
2. Surface Contamination
Even microscopic traces of silicone, wax, grease, or polish residue can create a barrier that prevents adhesion. Silicone contamination is particularly insidious because it can be transferred from detailing products, and even from nearby work areas.
The fix: Degrease before sanding and again after sanding. Use a dedicated wax and grease remover, and follow the manufacturer's instructions for dwell time and wipe-off technique. Never skip this step—it's the leading cause of adhesion failure in professional shops.
3. Chemical Incompatibility Between Layers
Adhesion failures aren't always mechanical—they can be chemical. Different paint systems use different resin technologies, and not all are compatible. Waterborne basecoats over certain solvent-based primers, or mismatched clearcoat systems, can create intercoat adhesion failure. Expired or improperly stored materials also fail to cure correctly, compromising adhesion.
The fix: Stick with a complete system from a single manufacturer—primer, basecoat, and clearcoat. If you must mix systems, test compatibility on a scrap panel first.
Diagnosing the Problem: How to Identify What Actually Failed
Before you start sanding everything back to bare metal, take the time to diagnose the failure. Look at the back of the peeled paint—it will tell you what went wrong.
Reading the Peeling Paint
-
If the peeled piece shows bare metal on the back: the failure is between the primer and the metal. The metal wasn't properly cleaned or etched.
-
If the primer stays on the metal but the color coat peeled away: the failure is between the primer and the basecoat. The primer surface was too smooth, contaminated, or the basecoat wasn't compatible.
-
If the basecoat stays on the primer but the clearcoat peeled: the failure is between basecoat and clearcoat. The basecoat was over-reduced, dried too long before clear application, or contaminated.
Quick Adhesion Test
Before committing to a full repaint, test the surrounding paint. Apply a 2-inch strip of masking tape firmly to the panel, then pull it off sharply. If paint lifts with the tape, the adhesion is compromised and that area needs to be stripped back to a stable layer.
How to Fix Peeling Paint: A Step-by-Step Approach
Once you've identified the failure point, here's the correct repair process—so it doesn't happen again.
Step 1: Remove All Unstable Paint
This is non-negotiable. If you paint over peeling paint, the new paint will peel too—guaranteed. Use a DA sander with 80-120 grit to remove loose paint, then feather-edge the transitions with 180-220 grit. If the paint is lifting in sheets, strip back to a stable, well-adhered layer. Don't stop until you hit solid substrate.
Step 2: Prepare the Substrate
-
Bare metal: Clean with wax and grease remover, then apply an etching primer or epoxy primer for maximum adhesion.
-
Existing paint: Sand with the appropriate grit (320-400 for sealing, 400-600 for direct-to-topcoat). Feather-edge all transitions—no hard lines.
-
Final clean: After sanding, clean the entire panel with wax and grease remover. Use a tack-rag immediately before painting.
Step 3: Apply Sealer
A quality sealer creates a uniform surface for the basecoat, enhances adhesion, and helps prevent sanding scratches from telegraphing through the finish. Apply it according to the manufacturer's recommended mil thickness.
Step 4: Spray with Proper Technique
This is where equipment makes the difference. A spray gun with inconsistent atomization or unreliable fluid control will compromise adhesion every time. Too dry leaves a porous basecoat with poor intercoat adhesion; too wet traps solvents that eventually lift the clearcoat.
The PORPHIS Advantage: Equipment That Supports Lasting Adhesion
A perfectly prepared surface can still fail if the spray gun introduces variables you can't control. Inconsistent atomization, uneven fan patterns, and unreliable fluid delivery all create film-build inconsistencies that become weak points—the places where peeling starts.
For painters who demand consistency across the entire coating system—primer, basecoat, and clearcoat—the PORPHIS PRD-625 is engineered to deliver. Featuring MP (Multi-Point) atomization technology, the PRD-625 produces an exceptionally even spray pattern where the top and bottom of the fan reach the same height simultaneously. This eliminates the "hot center / thin edges" problem that forces painters into excessive overlap—and creates the uniform film thickness that proper adhesion depends on.
The PRD-625 operates at 23-31 PSI with a remarkably low air consumption of just 10.2 CFM, making it compatible with a wide range of professional compressors. Its forged aluminum body with anodized coating and metal air distribution ring deliver consistent, predictable airflow—so every coat goes down exactly as intended.
What makes the PRD-625 particularly suited to adhesion-critical refinish work is its patented fluid adjustment system. This allows for precise quantitative control of fluid output, ensuring consistent film thickness across the entire panel—reducing the risk of overspray and solvent entrapment that can compromise long-term adhesion.
Whether you're applying sealer, basecoat, or clearcoat, the PRD-625's versatility across waterborne and solvent-based systems gives you one reliable tool for the entire job.
Preventing Paint Peeling: Best Practices for Long-Term Adhesion
Surface Preparation Checklist
| Step | Action |
|---|---|
| 1 | Degrease with wax and grease remover |
| 2 | Sand with appropriate grit—never skip grits |
| 3 | Feather-edge all transitions, eliminate hard lines |
| 4 | Blow off dust with clean, dry compressed air |
| 5 | Degrease again |
| 6 | Tack-rag immediately before painting |
Spraying Technique Tips
-
Apply basecoat in medium-wet coats. Too dry reduces intercoat adhesion; too wet traps solvents and risks peel later.
-
Respect flash times. Rushing between coats traps solvents; waiting too long reduces chemical cross-linking.
-
Clearcoat within the recommended window. If the basecoat cures too hard, the clearcoat won't bond chemically.
-
Use the correct reducer for ambient temperature. The wrong reducer affects application and curing.
Environmental Considerations
-
Temperature: Work in a controlled environment—extreme heat or cold affects both application and cure.
-
Humidity: High humidity causes moisture entrapment, a common adhesion killer.
-
Clean air: Install a water separator and oil filter on your air line. Contaminated air is one of the most overlooked causes of adhesion failure.For the related preparation and adhesion steps, use our guide to paint adhesion failure on plastic parts.
Frequently Asked Questions
Why did my paint peel even though I sanded with 400-grit?
400-grit may be too fine for your substrate. For bare metal or rough primer, start with 180-220 and work up. Also, check for contamination—sanding removes material but doesn't remove wax or silicone.
Can I just sand the peeling area and repaint?
No. If paint is peeling, the adhesion has already failed. Sanding over a failed layer won't fix the underlying problem—the new paint will peel the same way. For model-specific performance, setup, and application context, see our repairing paint delamination on a hood. Remove all unstable paint down to a sound substrate.
How can I tell if my paint is ready for the next coat?
Follow the manufacturer's recommended flash times. For a quick check, touch a masked-off area with a gloved finger—if it's still tacky, wait longer. Never rush between coats.
Is peeling always my fault?
Not always. UV exposure, temperature extremes, and chemical damage can cause peeling over time. But in fresh repaints—especially within the first few months—the cause is almost always preparation or application error.
What's the difference between mechanical and chemical adhesion?
Mechanical adhesion relies on paint gripping a roughened surface—that's why sanding matters. Chemical adhesion relies on chemical bonding between layers—that's why compatibility and flash times matter. Both are essential for a durable finish.
Conclusion
Paint peeling after a repaint is almost always preventable. The difference between a finish that lasts years and one that fails in months comes down to one thing: preparation. Proper abrasion, thorough cleaning, compatible materials, and correct technique are non-negotiable.
But preparation is only half the equation. Your equipment matters just as much. A spray gun that delivers consistent atomization and precise fluid control—like the PORPHIS PRD-625—gives you the control you need to apply every coat correctly. When every layer goes down with uniform thickness and proper flash, adhesion follows.
Invest time in preparation. Invest in quality equipment. And your paint jobs will stay exactly where they belong—on the car, not on the floor.
Share:
Mastering Spray Gun Air Pressure Regulation: A Comprehensive Guide for Automotive Painters
Clear Coat Runs Driving You Crazy? Here's How to Stop Them for Good