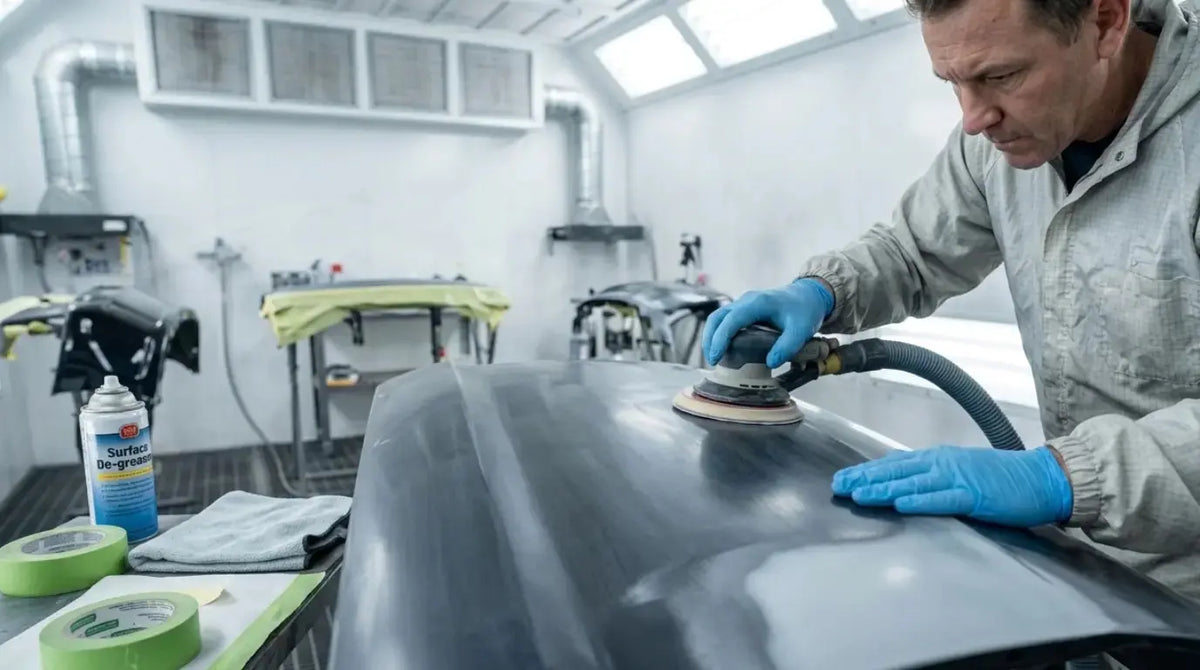
Ask any experienced automotive painter what separates a show-quality finish from a disappointing one, and you'll hear the same answer every time: preparation. The quality of your paint job is determined long before you ever pull the trigger on your spray gun. In fact, a poor prep job will sabotage even the most expensive paint and the finest spray equipment. For model-specific performance, setup, and application context, see our automotive pre-paint cleaner comparison.
This guide walks you through the professional approach to surface preparation before applying base coat. Whether you're working on a bare-metal restoration or a panel repair, these steps will ensure your base coat goes down correctly—and stays that way.
Why Preparation Before Base Coat Matters
The base coat is the color foundation of your paint system. For model-specific performance, setup, and application context, see our clear coat for acrylic lacquer base coat .It sits between the primer and the clear coat, delivering the color, depth, and metallic or pearl effects that define the final appearance. But base coat has very little hiding power on its own—it relies entirely on the surface beneath it to be smooth, clean, and properly prepared.
A poor prep job leads to:
-
Adhesion failure: Base coat that peels or flakes off
-
Visible scratches: Sanding marks that show through the color
-
Contamination defects: Fisheyes, pinholes, and surface imperfections
-
Uneven color: Patchy or blotchy appearance, especially with metallics and pearls
The good news is that these problems are entirely preventable with the right process.
Step 1: Assess the Substrate
Before you start sanding or masking, you need to know exactly what you're working with. The preparation process differs significantly depending on whether you're working with bare metal, existing paint, or primer.
Bare Metal
Bare metal requires the most thorough preparation. It must be:
-
Free of rust and corrosion: Remove all rust mechanically using sanding or blasting
-
Properly profiled: Sand bare metal with 80–120 grit to create a mechanical key for primer adhesion
-
Clean and degreased: Use a dedicated wax and grease remover—never household solvents
Critical step: Bare metal must be primed (most commonly with a 2K epoxy primer) before any base coat is applied. Skipping primer on bare metal risks poor adhesion, rapid corrosion, and premature failure.
Existing Paint (In Good Condition)
If you're painting over existing paint that's in sound condition, you still need to:
-
Scuff the surface: Use 400–600 grit (wet) or 500–800 grit (dry) to create adhesion
-
Feather-edge repairs: Smooth out any chips, scratches, or damaged areas
-
Clean thoroughly: Remove all contaminants
Existing Primer (Cured)
If you're working with a cured primer surface, sand it smooth with progressively finer grits—typically finishing with 400–600 grit—and ensure it's clean and free of dust.
Step 2: Degreasing and Cleaning
Contamination is the enemy of a good paint job. Even invisible traces of silicone, oil, or wax can cause fisheyes, adhesion failure, or cratering in your base coat.
The Professional Cleaning Process
-
Initial wash: Use a mild detergent and warm water to remove loose dirt For model-specific performance, setup, and application context, see our water-based automotive paint guide .
-
Wax and grease remover: Apply a dedicated automotive wax and grease remover with clean, lint-free cloths. Work in one direction and use fresh cloths frequently—don't wipe contaminants back onto the surface.
-
Tack rag: Just before painting, use a tack rag to remove any final dust particles
-
Anti-static wipe: For the final cleaning before base coat, use an anti-static wax and grease remover to prevent dust attraction
Pro Tip: Change your cleaning cloths often. A contaminated cloth will spread the very contaminants you're trying to remove.
Step 3: Sanding and Scuffing
The goal of sanding before base coat is to create a uniformly dull surface with enough "tooth" for the base coat to grip onto. The specific grit depends on what you're sanding.
Recommended Grits by Substrate
Sanding Techniques
-
Use a block: Always use a sanding block for flat panels—never sand with your fingers alone, which creates uneven pressure and wavy surfaces
-
Progress through grits: Start coarse and move progressively finer, removing scratches from the previous grit at each stage
-
Wet sanding: For final grits, wet sanding produces a smoother finish and keeps dust down
-
Guide coat: Apply a guide coat between stages to identify low spots and ensure even sanding
Step 4: Masking and Final Preparation
Before applying base coat, you need to protect everything that shouldn't be painted and ensure the painting environment is clean.
Masking Best Practices
-
Use high-quality automotive masking tape and paper
-
Mask edges carefully: Overspray on trim or windows is difficult and expensive to remove
-
Create a "peel" edge: Fold the tape edge back slightly to prevent a hard paint line
-
Mask the entire vehicle if painting a panel, to prevent overspray on adjacent areas
Environment Control
-
Dust control: Wet the floor of your booth or garage before painting to trap dust. Use a clean, well-ventilated area.
Step 5: Sealer Application (Optional but Recommended)
A sealer is applied immediately before base coat to create a uniform surface and improve adhesion. It's especially important when:
-
Transitioning from repaired areas to OEM finishes
-
Painting over multiple colors or materials
-
Using a lighter base coat color that might "ghost" through
Application tip: A sealer is typically applied as a single medium-wet coat and allowed to flash before the base coat is applied.
Step 6: Base Coat Application
Once your surface is properly prepared and sealed, you're ready for base coat. But even here, technique matters.
Base Coat Application Tips
-
Apply in thin layers: Most colors require 2–4 coats for full coverage and effect
-
Allow proper flash-off: Wait until each coat is dry to the touch before applying the next
-
Maintain consistent gun distance: Keep your spray gun 6–8 inches from the panel
-
Use consistent overlap: Aim for 50–70% overlap to ensure even coverage
-
Paint edges first: Then move to the main panel for a more even finish
Why Your Spray Gun Is Critical to Prep Success
Even with perfect surface preparation, your results depend on the quality of your spray gun. A poorly atomizing gun can ruin a perfectly prepped surface with:
-
Uneven coverage: Caused by inconsistent spray patterns
-
Tiger striping: Dark and light bands from uneven metallic flake distribution
-
Dry spray: Caused by poor atomization or incorrect pressure settings
-
Runs and sags: From inconsistent material delivery
A high-quality spray gun ensures that your careful preparation pays off with a flawless finish.
For professionals and serious DIYers alike, the PORPHIS PRD-817 is engineered to deliver the consistent, reliable performance that makes all your preparation work worthwhile. Here's why:-
Superior VS Atomization: The Very Smooth atomization design produces an exceptionally fine and even spray pattern. This ensures that your base coat lays down uniformly, revealing the true color and effect without tiger striping or blotchiness.
-
Optimized for Automotive Base Coats: With a 1.3mm nozzle and recommended 18‑26 PSI inlet pressure, the PRD‑817 is precisely calibrated for spraying automotive base coats, giving you the control to apply thin, even coats that build coverage correctly.
-
Professional Build for Consistent Results: The precision engineering ensures that every pass delivers the same consistent spray pattern, allowing you to focus on your technique and the results your preparation deserves.
Common Prep Mistakes to Avoid
1. Skipping the Degreasing Step
Rushing through or skipping degreasing is the number one cause of paint defects. A contaminated surface will cause fisheyes every time.
2. Using the Wrong Grit
Sanding too coarse leaves scratches that show through the base coat. Sanding too fine leaves insufficient tooth for adhesion. Always follow the manufacturer's recommended grits.
3. Rushing Flash-Off Times
Applying the next coat too early traps solvents and can cause blistering or poor adhesion. Respect the flash-off times.
4. Over-Reducing the Base Coat
Adding too much reducer to "make it spray better" often results in thin coverage, runs, and poor hiding. Follow the manufacturer's mix ratios.
5. Not Testing the Spray Pattern
Always test your spray pattern on masking paper before touching the car. Check that the fan is even and the paint is atomizing properly.
Frequently Asked Questions
Q1: Can I apply base coat directly over bare metal?
A: No. Bare metal must be primed—most commonly with a 2K epoxy primer—before any base coat is applied. Skipping primer risks poor adhesion and rapid corrosion.
Q2: What grit should I use to sand before base coat?
A: For cured primer, use 400–600 grit (wet) or 500–800 grit (dry). For scuffing existing paint, 600–800 grit is typically recommended. Always check the paint manufacturer's Technical Data Sheet for specific recommendations.
Q3: How do I know if my surface is clean enough?
A: After degreasing, wipe the surface with a clean, white cloth. If you see any residue on the cloth, the surface isn't clean enough. Repeat the degreasing step with fresh cloths.
Q4: What happens if I don't use a sealer before base coat?
A: A sealer isn't always required, but it provides a uniform surface and improves adhesion, especially when transitioning from repaired areas to OEM finishes. Skipping it can result in uneven color absorption or "ghosting" of underlying repairs.
Q5: Why is my base coat showing sanding scratches?
A: This usually means your final sanding grit was too coarse, or you didn't properly remove scratches from the previous grit before moving to the next. For the related preparation and adhesion steps, use our guide to sanding basecoat with 2000 grit before clear . Always progress through grits and finish with the recommended final grit for your paint system.
Final Verdict
Paint preparation before base coat isn't glamorous, but it's the foundation upon which every great paint job is built. By following the professional steps outlined in this guide—proper substrate assessment, thorough degreasing, correct sanding techniques, careful masking, and the use of quality equipment—you set yourself up for a flawless finish every time.
Remember: a paint job is only as good as the preparation beneath it. Invest the time in getting the prep right, and your base coat will reward you with a finish that looks professional and lasts for years.
Share:
HVLP Finish Inconsistency: Why Your Paint Job Looks Uneven and How to Fix It
Reflective Clear Coat Paint: The Complete Guide to a Mirror-Like Finish